The Crazy Hat Box

there's a hat for that!

Chalk It Up to Repurposing

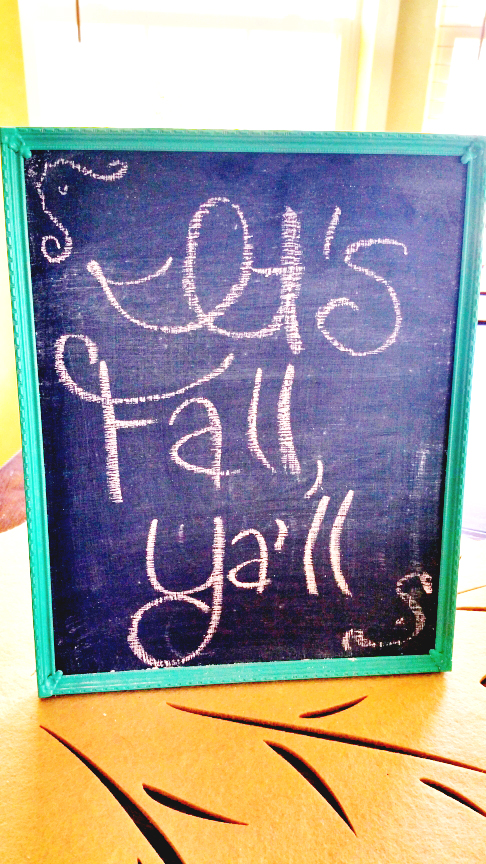
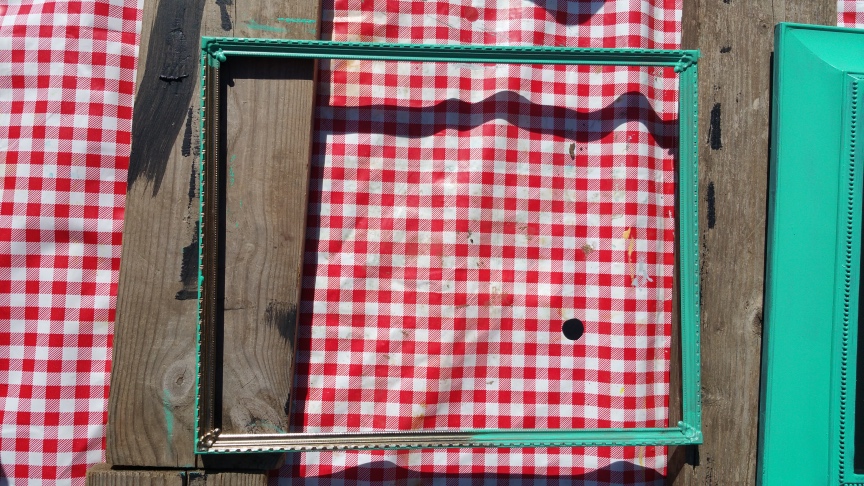
Let’s talk picture frames.  Who doesn’t have a ton of them stashed away somewhere, and who hasn’t given a ton to charity (or the trash man).  You know what I’m talking about.  Frames that are outdated or nicked or scratched.  Frames that you swear you’re going to use again… somewhere.  Well, why not give those frames a new look – and a new purpose as a chalk board!

Step 1:  Choose your frame

It really doesn’t matter what type of frame you have or what size.  It can be metal or wood; thin-framed or thick.  Just whatever strikes your fancy.  If you’re a clutter-free freak and don’t happen to have spare frames (is there such a person?), don’t worry, you can pick frames up for cheap at your local Goodwill or Thrift Store.  I do have frames stashed away, but picked up one at Goodwill anyway because I wanted one with a thin frame.

image001

Step 2:  Paint your frame

Remove the back and the glass and paint your frame. You can choose to spray paint or brush it on.  In this case, I brushed it on using a paint I had leftover from another project.

image003

Step 3: Paint the Glass with chalkboard paint

With the glass still removed from the frame, paint it with chalkboard paint following the directions on the can.  Remember to apply the paint as smoothly as possible so that it’s easy to write on with chalk.  Several coats are required to make it look like a chalkboard, especially on glass.

image002

Step 4:  Put it all together

When everything is dry (I waited several days), you can condition the chalkboard paint following the directions on the can, and put the frame, glass and backing together again.  Tada!  You have a super cute, customized chalkboard.

image004

Leave a comment »

Countdown to Thanksgiving – 1 Day left!

With tomorrow being Thanksgiving, I’m sure you’ve gotten all your big stuff – turkey, sides, desserts – as prepped as they can be.  You may even have your house cleaned and table set.  Today’s post is about the little things that you may want to add to make Thanksgiving day even more special and entertaining.

Place Cards

If you have a seating arrangement for your gathering, instead of traditional place cards, why not do something a little more Thanksgiving-y.  For example, put a different Bible verse about thankfulness at each place setting.  Or, under the person’s name, write something you’re thankful for about them!

IMG_8946

Games

Why not fill some of the time you’re not eating delicious food with games?   Try the Thanksgiving Trivia sheet or Turkey Trivia.

For the Kids

Set out a turkey coloring sheet and crayons for a craft that requires minimal adult supervision, or, for something requiring a little more adult assistance, try the Grateful Turkey!


For more Thanksgiving ideas, check out our Pinterest board, The Pilgrim’s Hat!


Leave a comment »

Paper Pumpkins

This project is super easy.  If you already have the supplies, it only takes a few minutes to make.  I’ve used them for place settings on a Thanksgiving table before.

Paper Pumpkins 5

For the larger pumpkin, I cut the paper into strips measuring 1 1/2 inches wide.  I used 12″ x 12″ scrapbook paper.

Paper Pumpkins 3

I then punched a small hole into the bottom and top of the strips of paper.

Paper Pumpkins 2

I used 6 strips, but you could use more if you like.  I put the brad in the bottom hole of each strip and closed it.  Then, I spread out the strips to where they sort of look like a spider.

Paper Pumkins 1

I then put the brad in one strip at a time and then closed it.  You have to play with these a little to get them to sit flat.  I folded the bottom part a little so it would sit.  Then, I wrapped the pipe cleaner around a pen to make it curly.  Once that was done, I wrapped it around the brad to make the vine part of the pumpkin.

Paper Pumpkins 4

To make these for Halloween, it would be easy to put googly eyes on them, or even a spider brad would be fun.  Of course you wouldn’t want to use a candle in them, but a battery candle would work nicely.

For the smaller one I cut the strips 1″ wide.  I decided to try it with 2 different colors and I think it looks kinda cute.  This would be super easy to do with kids.  You can add glitter or stickers or stamps.  Easy and quick!

Paper Pumkin Littles 2 Paper Pumkin Littles 1

Leave a comment »