The Crazy Hat Box

there's a hat for that!

Countdown to Thanksgiving – 5 Days Left!

Continuing our Countdown to Thanksgiving, here’s a fun family activity to do the week of or day of Thanksgiving!

Our Thankfulness Tree

This month, to help our family focus on the things we’re thankful for, we’re doing a Thankfulness Tree.  Every night after dinner, we each put something we’re thankful for on a leaf and tape it to the tree.  If we have dinner guests, they participate, too!  I love to see our tree filling up with all the blessings God’s given us!

20141117_192242 (1)

My six-year-old helped me draw the tree, and we hung it on our living room wall.  The leaves were cut out on my Cricut, but you could also find a pattern online and cut it out with scissors.  The kids love putting the leaves on the tree, and I love that they are learning about gratefulness.


Want more ideas for Thanksgiving?  Check out our Pinterest Board, The Pilgrim’s Hat!


Leave a comment »

Paper Pumpkins

This project is super easy.  If you already have the supplies, it only takes a few minutes to make.  I’ve used them for place settings on a Thanksgiving table before.

Paper Pumpkins 5

For the larger pumpkin, I cut the paper into strips measuring 1 1/2 inches wide.  I used 12″ x 12″ scrapbook paper.

Paper Pumpkins 3

I then punched a small hole into the bottom and top of the strips of paper.

Paper Pumpkins 2

I used 6 strips, but you could use more if you like.  I put the brad in the bottom hole of each strip and closed it.  Then, I spread out the strips to where they sort of look like a spider.

Paper Pumkins 1

I then put the brad in one strip at a time and then closed it.  You have to play with these a little to get them to sit flat.  I folded the bottom part a little so it would sit.  Then, I wrapped the pipe cleaner around a pen to make it curly.  Once that was done, I wrapped it around the brad to make the vine part of the pumpkin.

Paper Pumpkins 4

To make these for Halloween, it would be easy to put googly eyes on them, or even a spider brad would be fun.  Of course you wouldn’t want to use a candle in them, but a battery candle would work nicely.

For the smaller one I cut the strips 1″ wide.  I decided to try it with 2 different colors and I think it looks kinda cute.  This would be super easy to do with kids.  You can add glitter or stickers or stamps.  Easy and quick!

Paper Pumkin Littles 2 Paper Pumkin Littles 1

Leave a comment »

Spiderweb Door Decoration

I have two boys, and in true boy fashion, they love dirt, making messes, bugs, and spiders.  So, to help celebrate the season, we did a spider and spiderweb craft.  I’ve seen a lot of examples for making various bugs and animals out of egg cartons, but, let’s face it, the spider’s web is just as cool as the spider itself.  Why not make a web for our egg carton spiders and hang it on the door?  It ended up being so cute, and a perfect way to spend a sick day away from school.

What you’ll need:

  • An egg carton
  • Paint, markers, or crayons
  • Googly eyes
  • Glue
  • Pipe cleaners
  • String
  • Popsicle sticks

I cut the egg carton into sections of two egg cups each.  I was just going to cut it into one egg-cup sections, but my six-year-old informed me that spiders have a head AND and abdomen.  Then, we painted our spider bodies.

IMG_8944

IMG_8942

While our spider bodies dried, I made the web (my kids are a little too young to be able to do this part).  I glued popsicle sticks together in a sort of circle.

IMG_8948

Then, I wrapped string around it (as much to help it stay together as for aesthetic reasons).  I cut a smaller portion of string and made it into a circle to use in the center of the web, then wrapped string around the outside popsicle circle and through the inside string circle.  Finally, I wove string through it all to make the web!  Don’t forget to add a loop at the top so you can hang up the web!

IMG_8949

When our spider bodies were dry, we glued googly eyes to them and added pipe cleaner legs – two pipe cleaners cut into four pieces for a total of eight legs each.

IMG_8955

IMG_8952

Isn’t this the cutest door decoration?  The pipe cleaner legs hooked perfectly around the web, keeping the spiders in place!

IMG_8961

IMG_8957


Happy Halloween!!

Leave a comment »

The Last-Minute Father’s Day

Did you know that Sunday is Father’s Day?  Yeah, me too.  But, I have a, um, friend who didn’t realize that since June 1 was on a Sunday, the third Sunday in June would fall on the 15th.  Really early.  Anyway, I my friend started looking for Father’s Day crafts on Pinterest (where else?) that the her kids could do for their awesome, amazing dad.  I She wanted to share the list with you, in case you, too, were a little caught off guard by Father’s Day.

Here’s my her Pinterest list of the top seven things you can do for last-minute Father’s Day gifts.  You can do most of these things with stuff you probably already have on hand.  Why only seven things?  Because who has the time to look for more?  It’s two days away, people!  The kids and I  She and her kids need to get crafting!

1.  A personalized coffee mug

2.  A Father’s Day Coupon Book

3.  Superhero Dad Book

4.  All About My Dad Page

5.  A Picture of your kids wearing dad’s clothes.  You could take the picture yourself and either print it at home or at a one-hour photo lab.  Or, if you’re really pressed for time, post it on his Facebook wall as a sort of e-card.

6.  A Jar of Candy With a Cute Saying

7.  A Printable Card Your Kids can Color.  It even has a cute, printable envelope to go with it!


You can also see these on our Father’s Day Crafts Pinterest board.  http://www.pinterest.com/thecrazyhatbox/


Leave a comment »

Footprint Butterfly Flowerpots

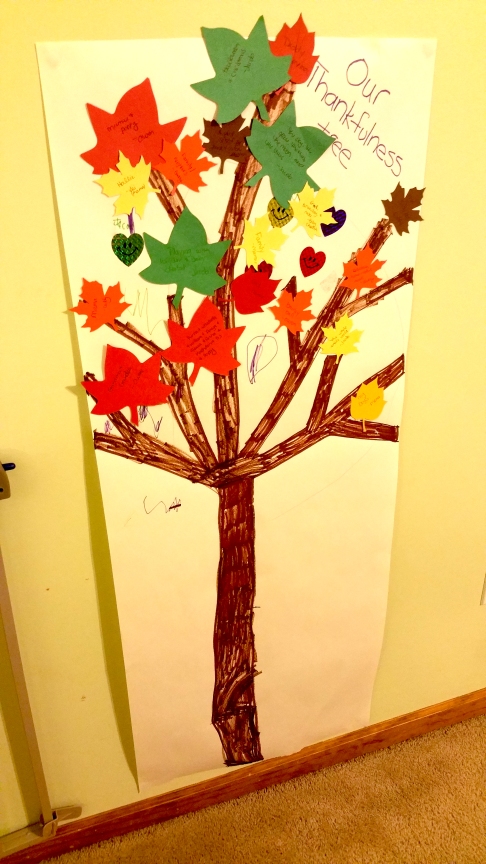
I love Pinterest! There are all kinds of neat projects and organization ideas that I would love to try and make for myself. A little before mother’s day I found a pin that I thought would make a great gift idea for the moms and grandmas in my life. It is the butterfly flower pot pin. This seems to be a pretty popular pin. I did some looking around to see where the idea came from. I think that Carol’s Classic Gifts and Décor’s had the original idea and posted it on their Facebook page. There is a chance that this is wrong and if that is the case please let us at The Crazy Hat Box know.

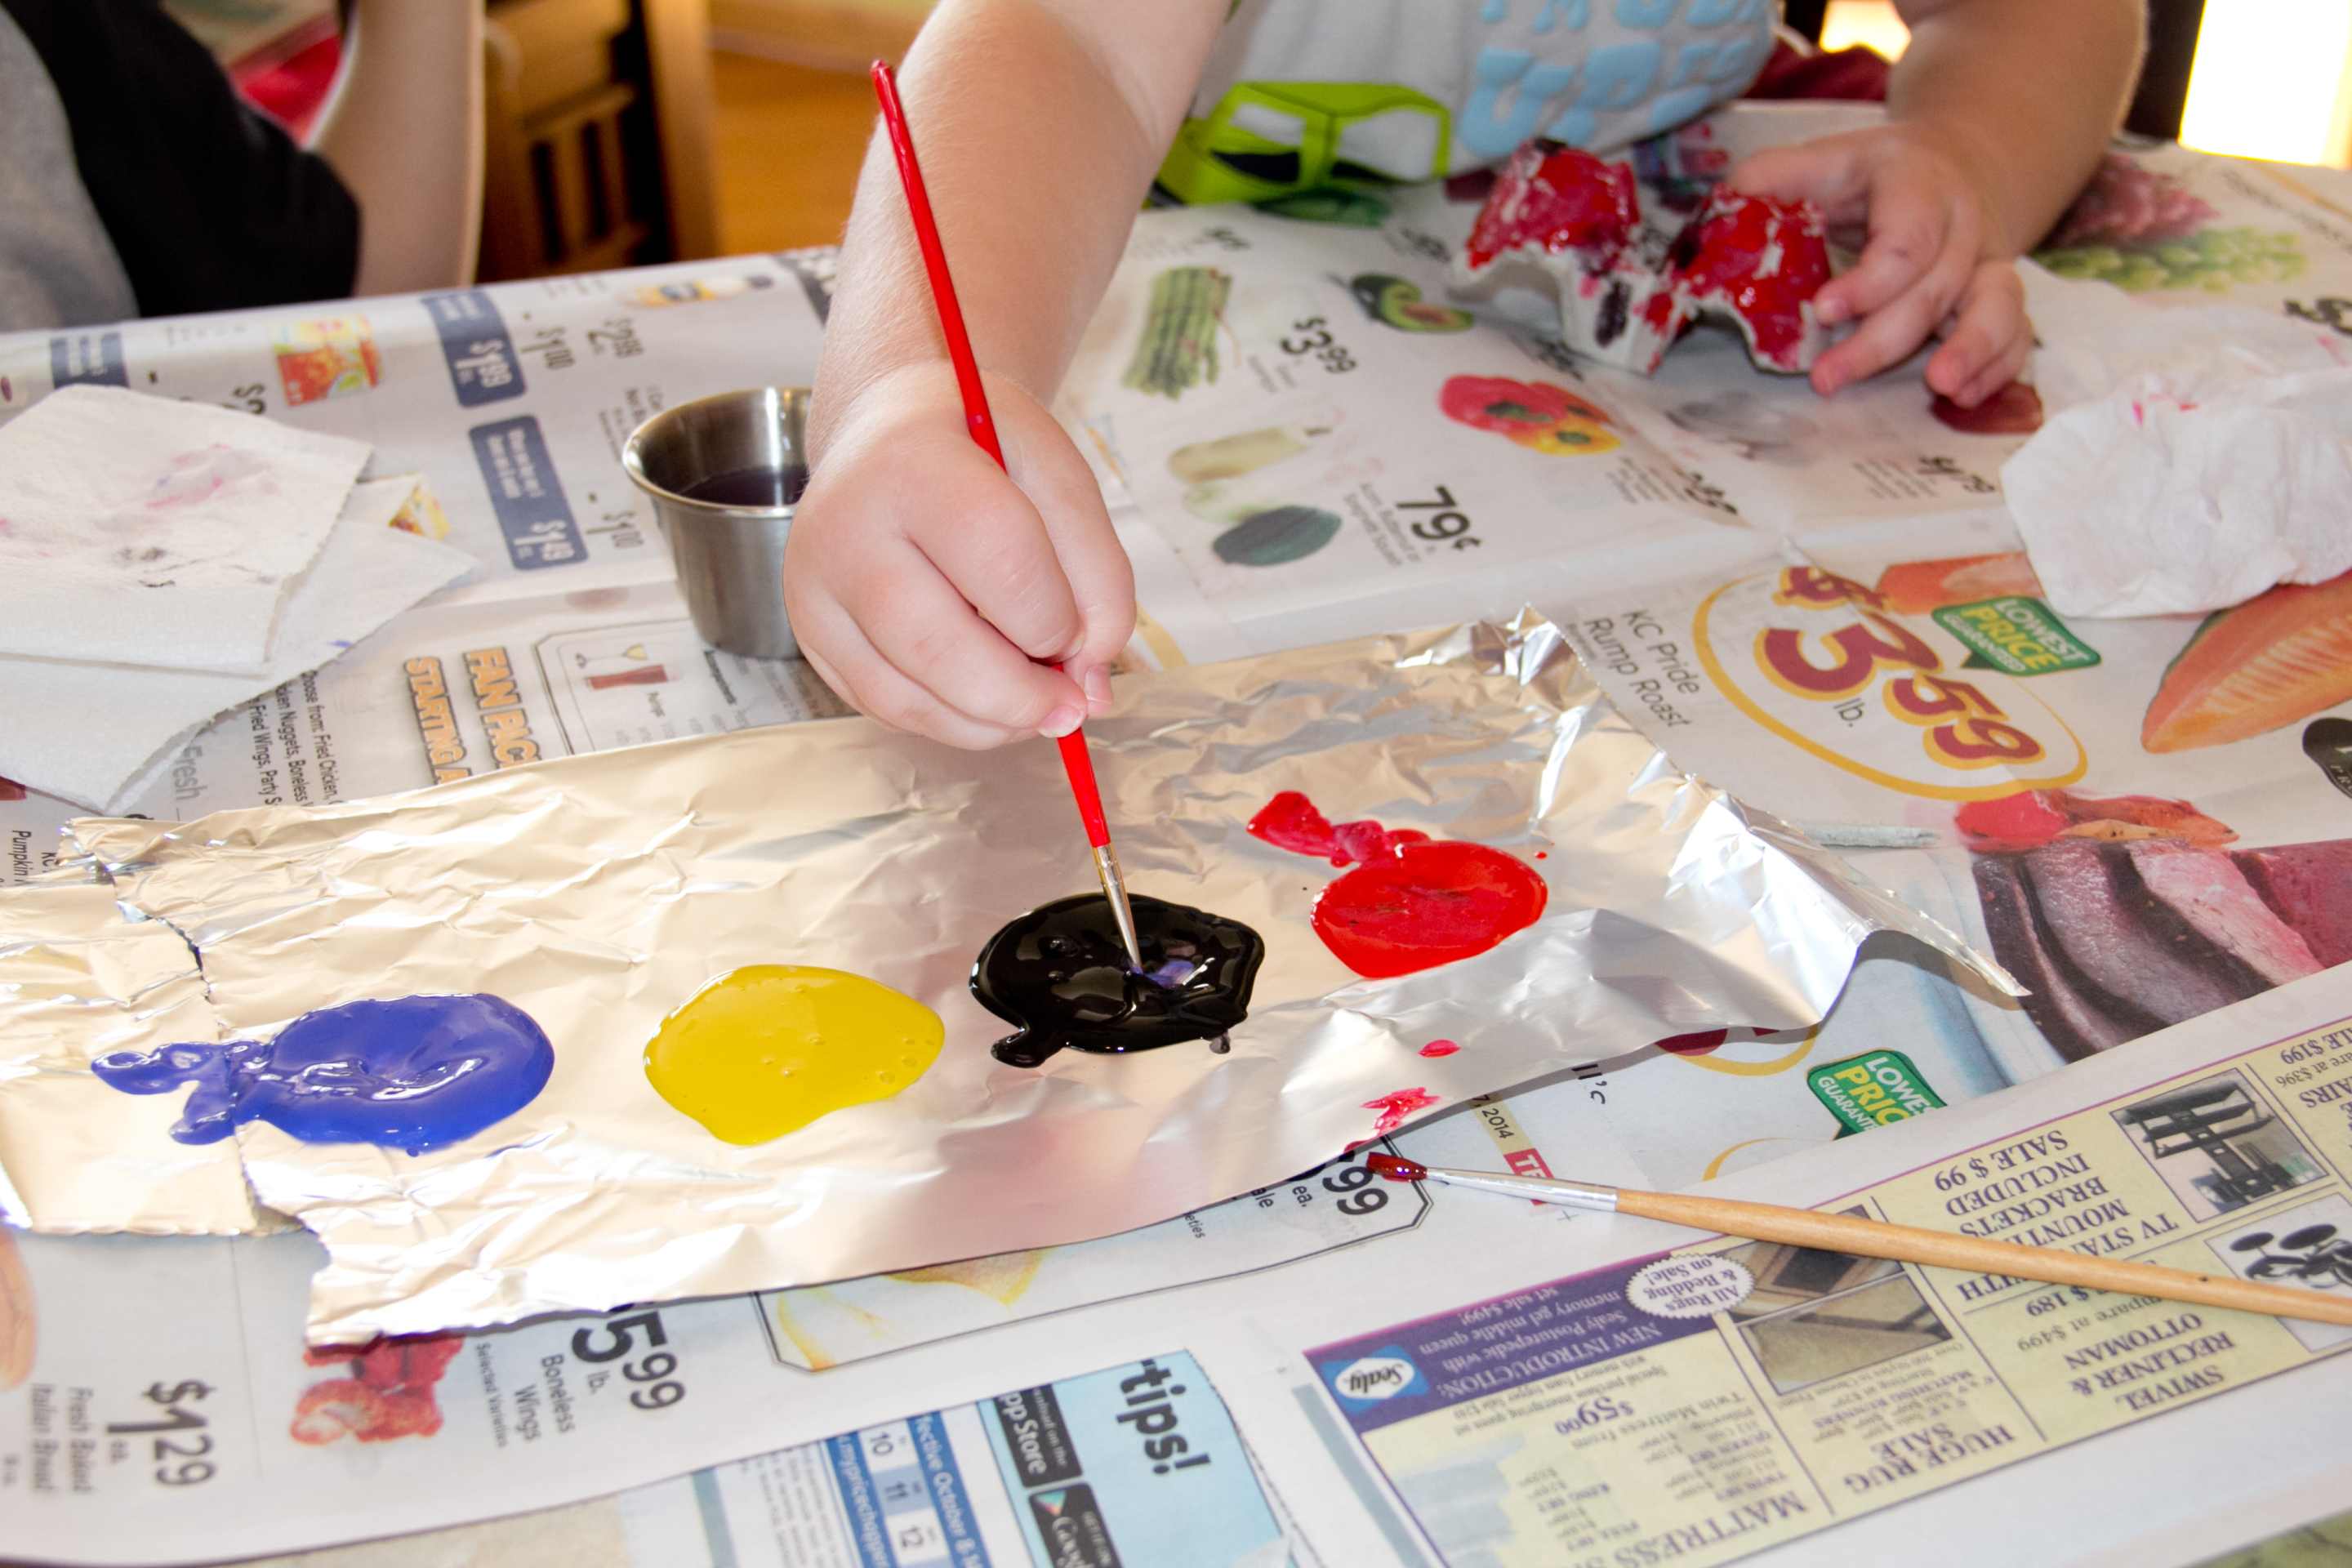
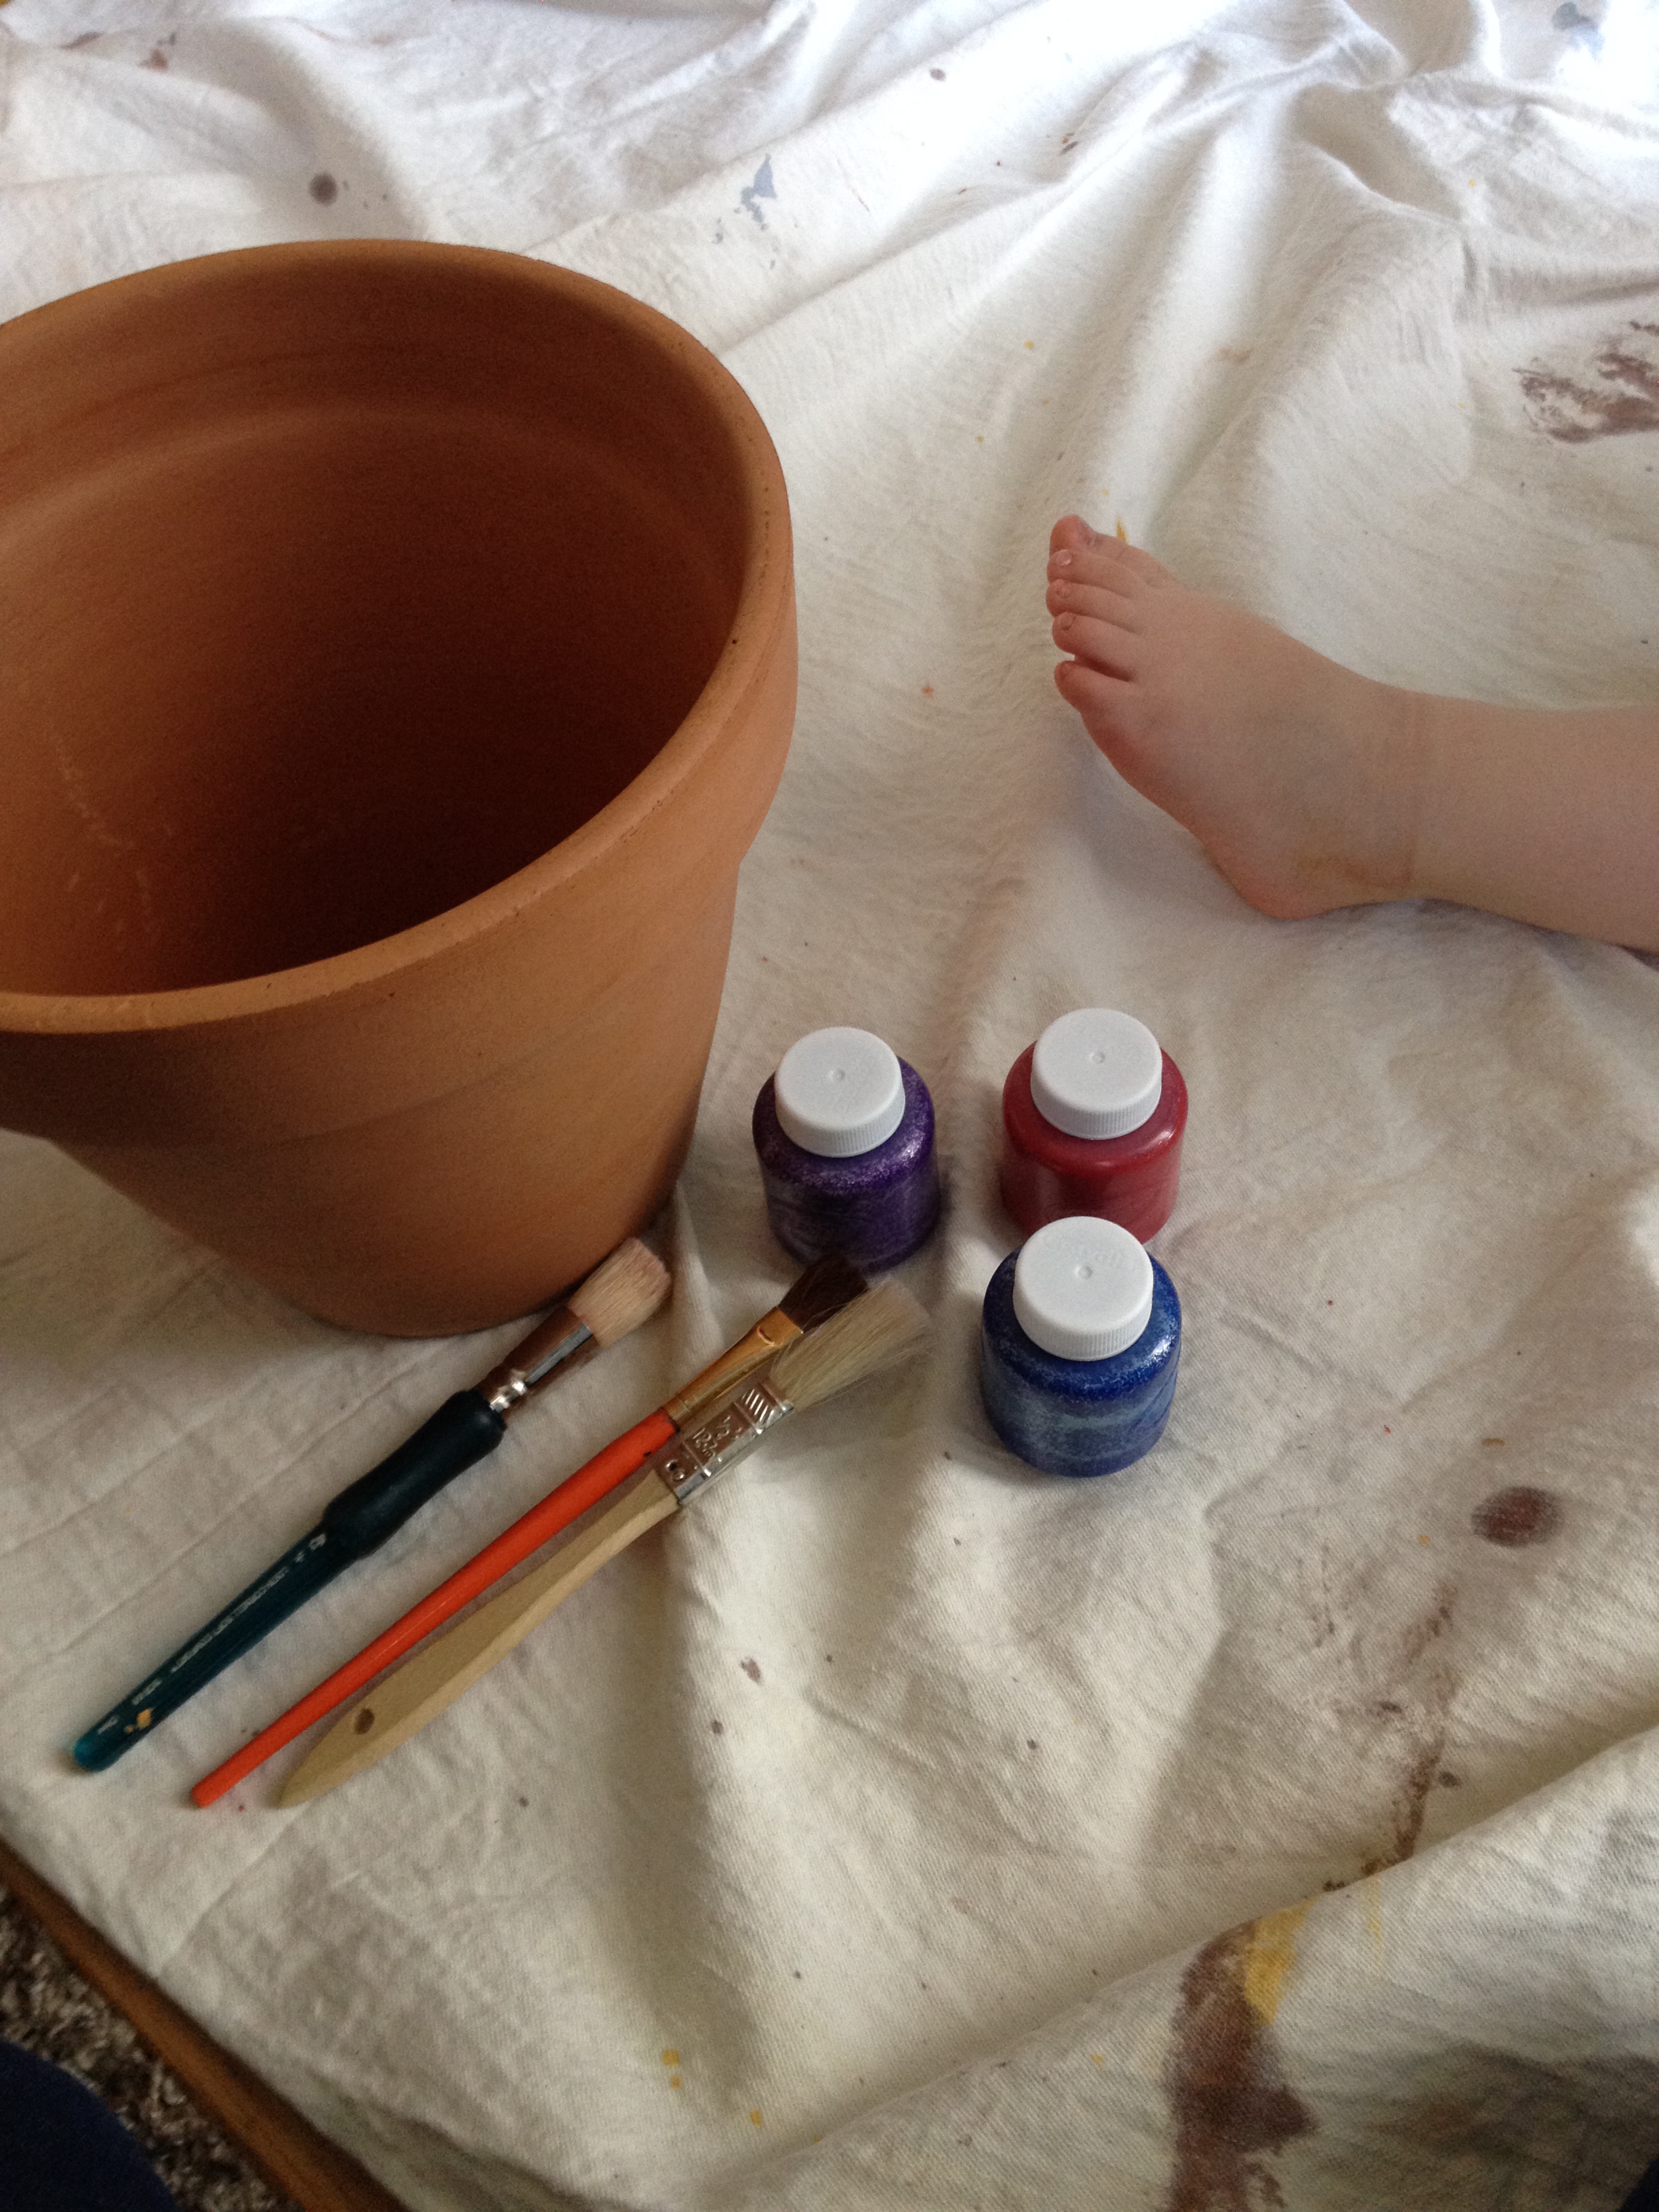
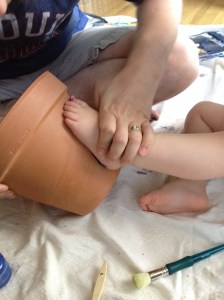
Here is a photo of what I got started with. A flower pot, some washable paint, paint brushes and a foot.

photo 1


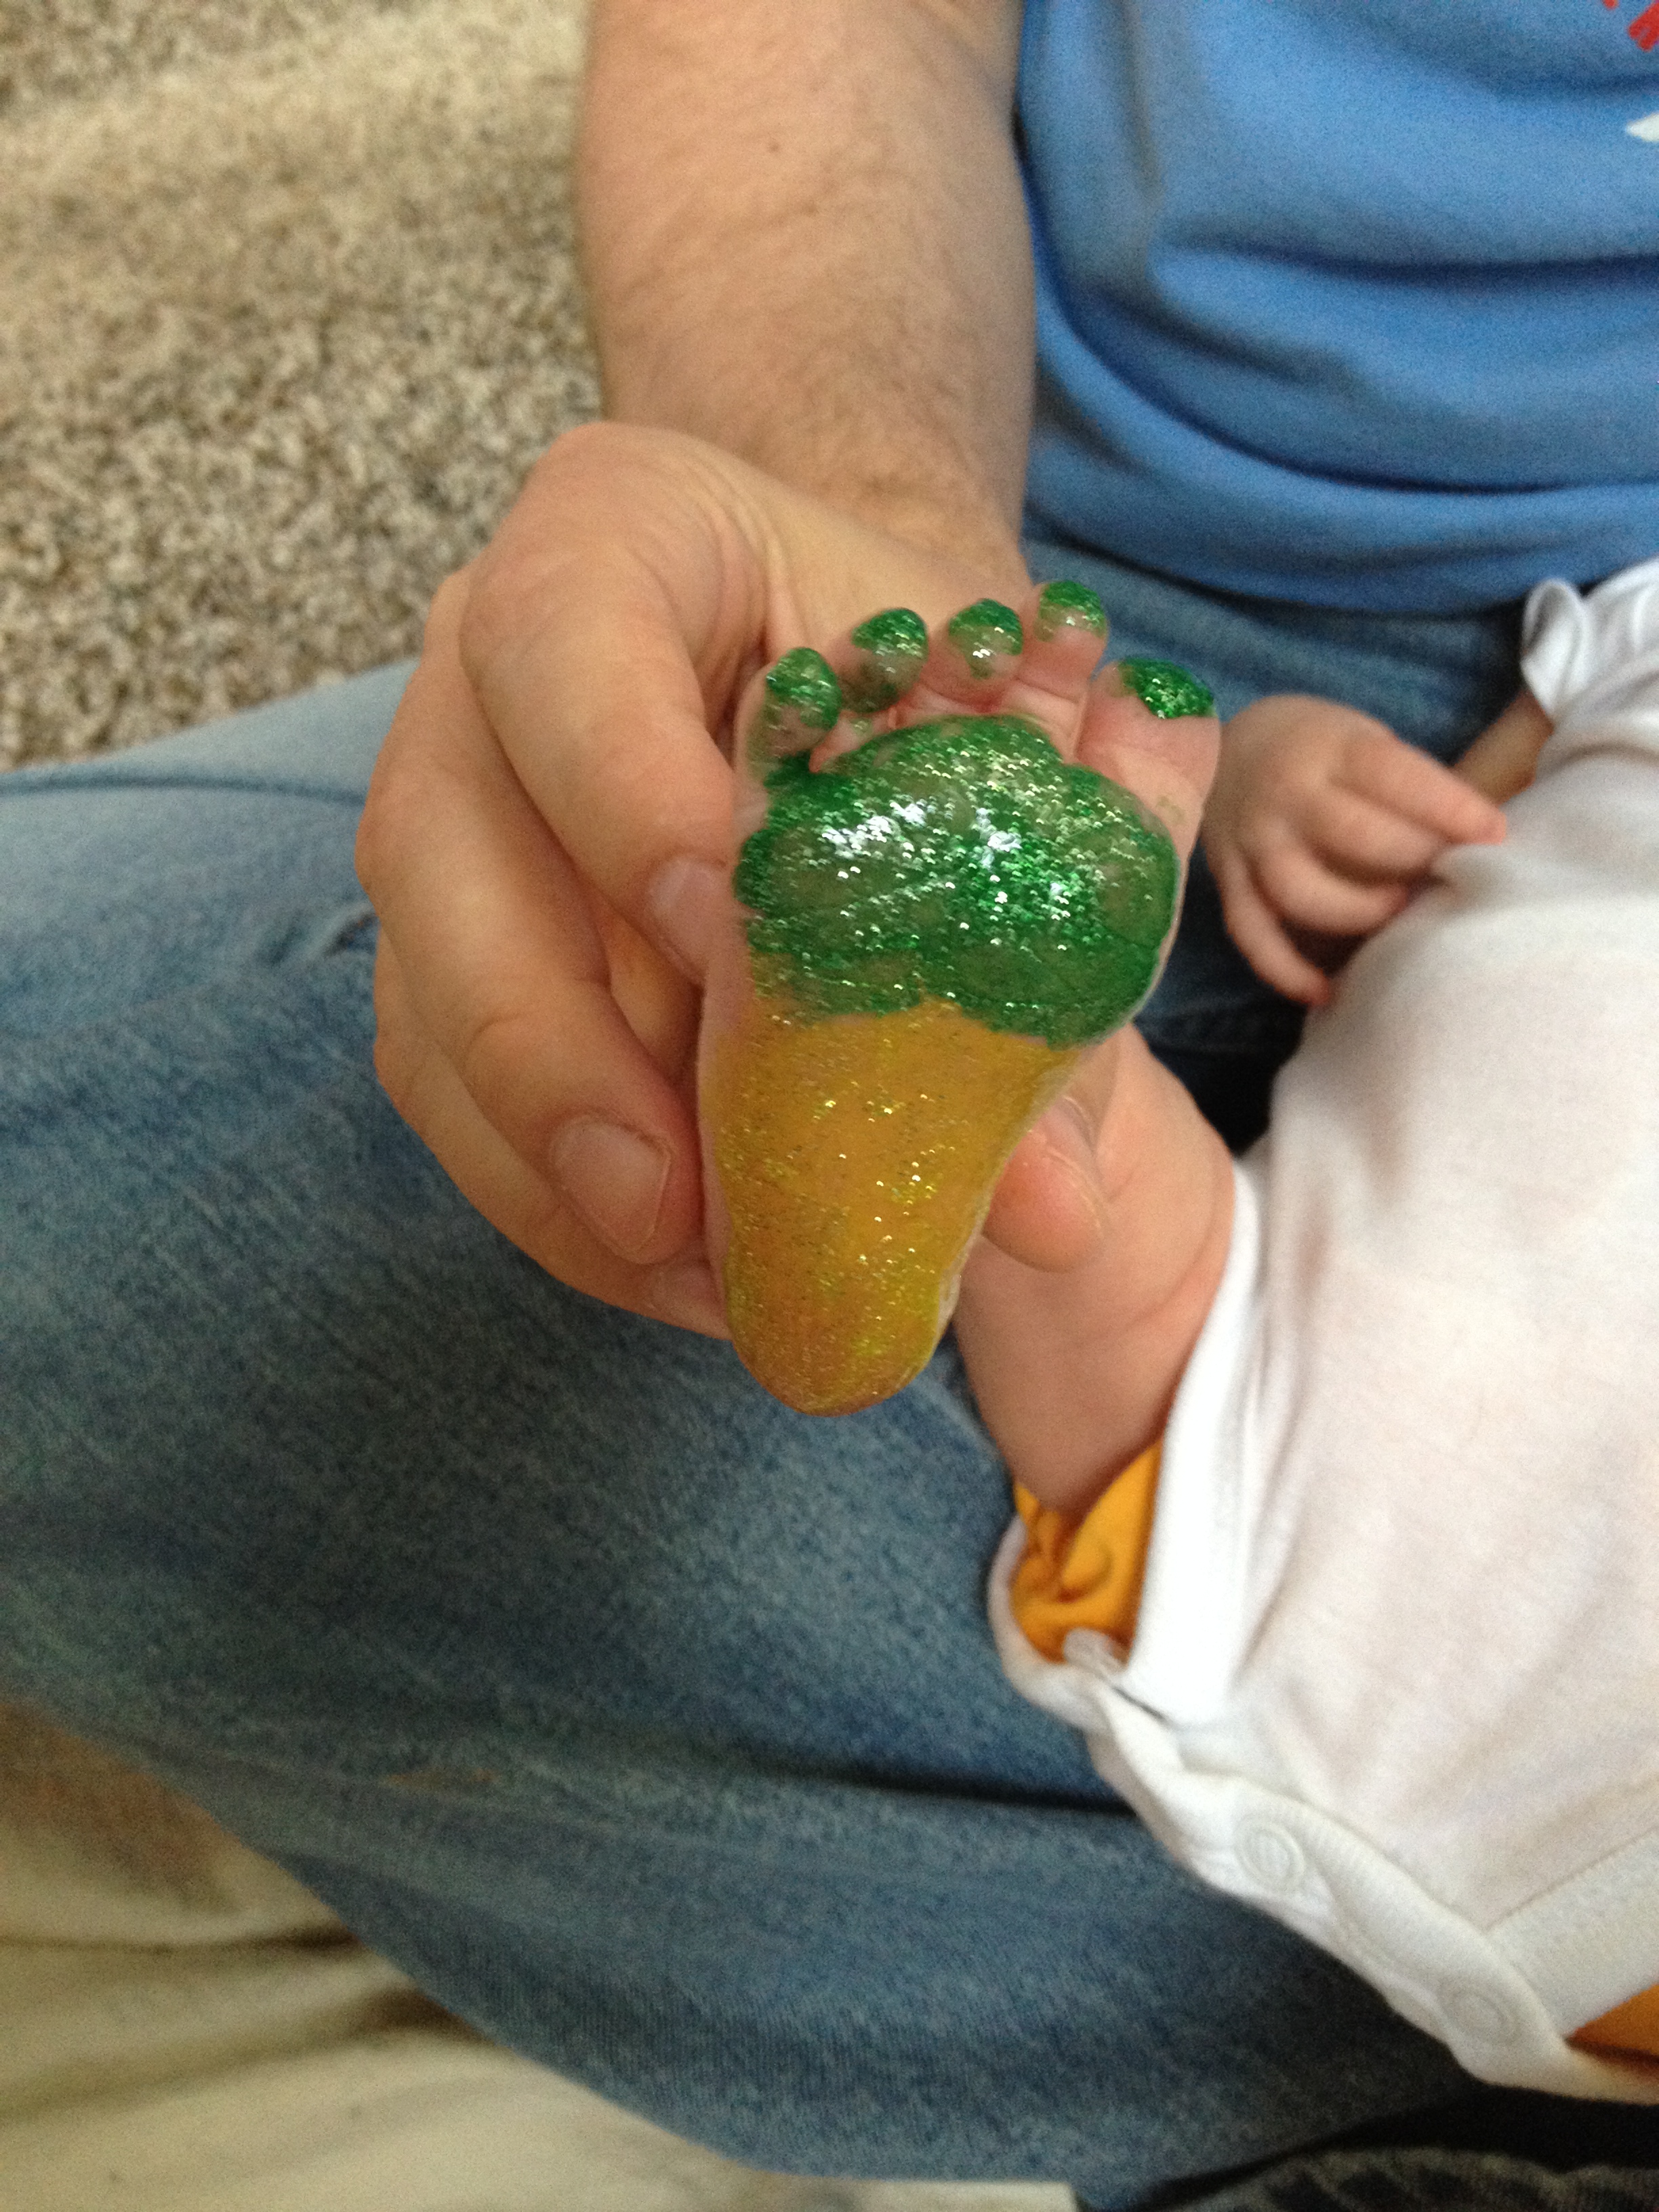
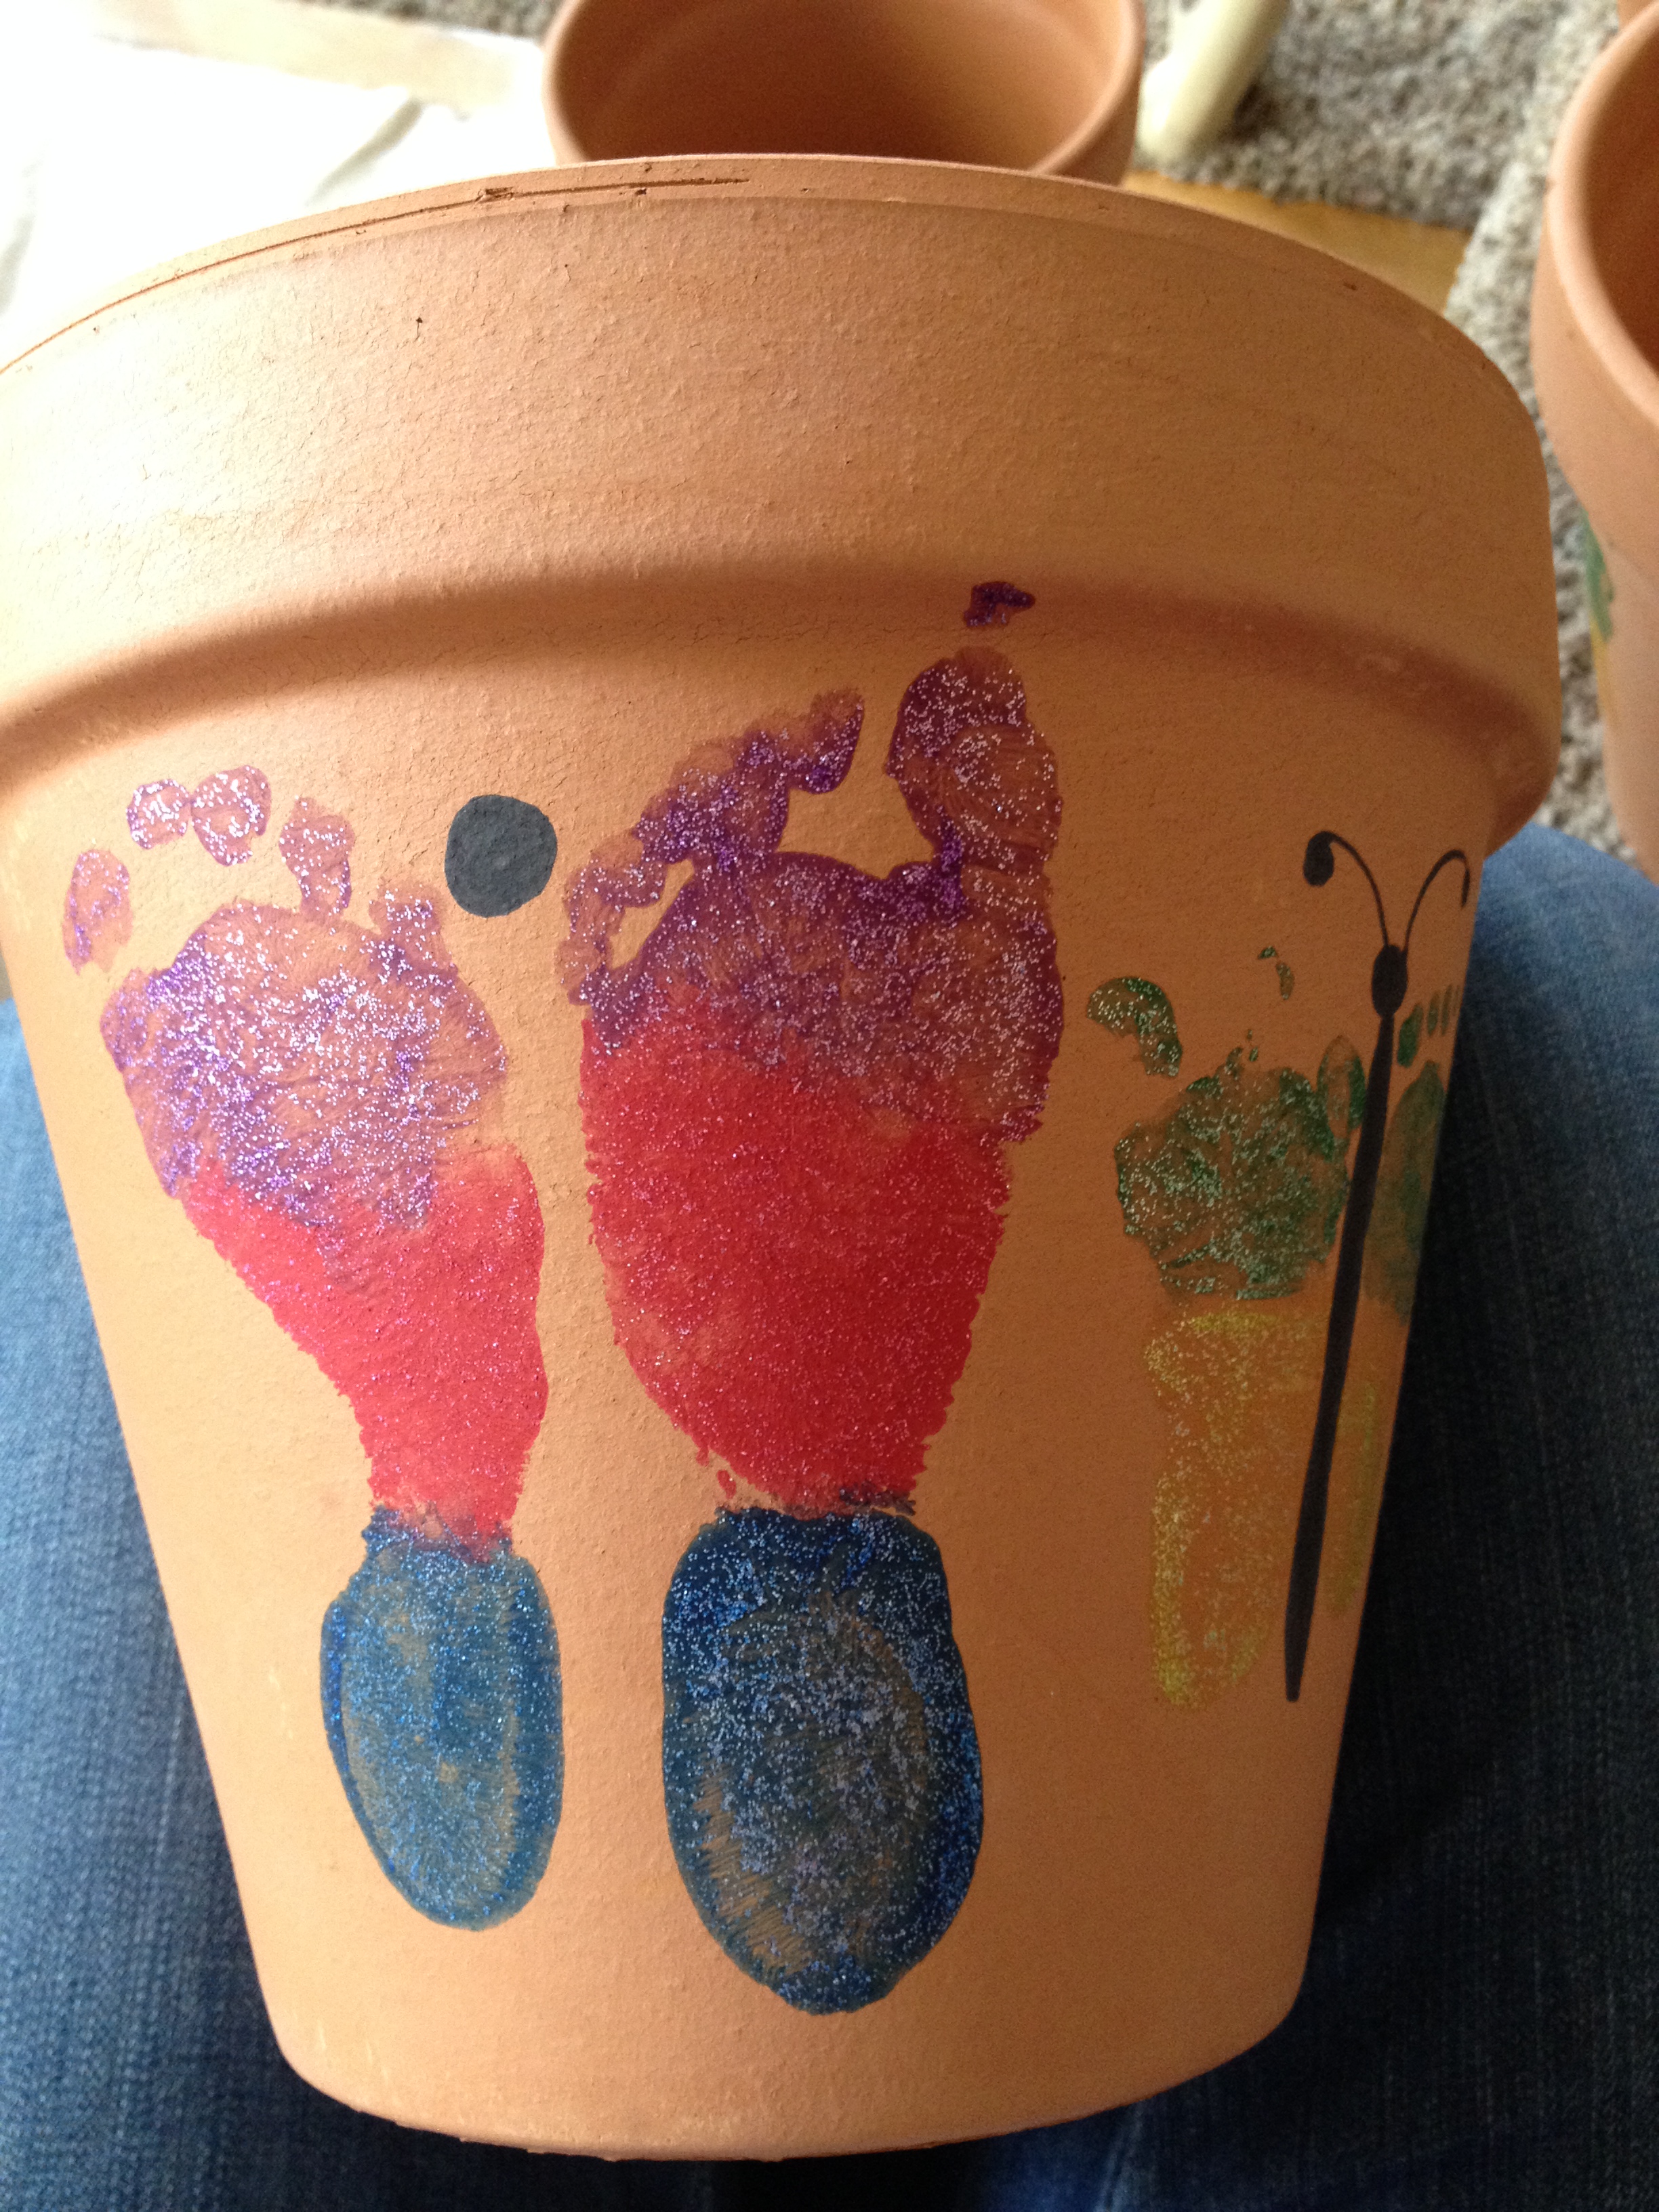
I took one of my daughter’s shoes with me when I was shopping for the flower pots to make sure that I bought one that was large enough for her foot print to fit on. I let her pick out the three colors that she wanted to paint on her foot. She picked purple, red, and blue. I painted her foot while my husband held her foot so that she didn’t get the paint everywhere. Next her foot was pressed against the flower pot.

photo 2photo 3

We made several of these pots so we did all the footprints from one foot on all the pots before moving to the other foot. When we had my daughter’s foot prints finished we moved to my son. We chose two colors for him since his foot is so tiny. We repeated the same process with his footprints.

photo 4

Once the footprints were dry I took a sharpie and drew in the butterfly body.

photo 5

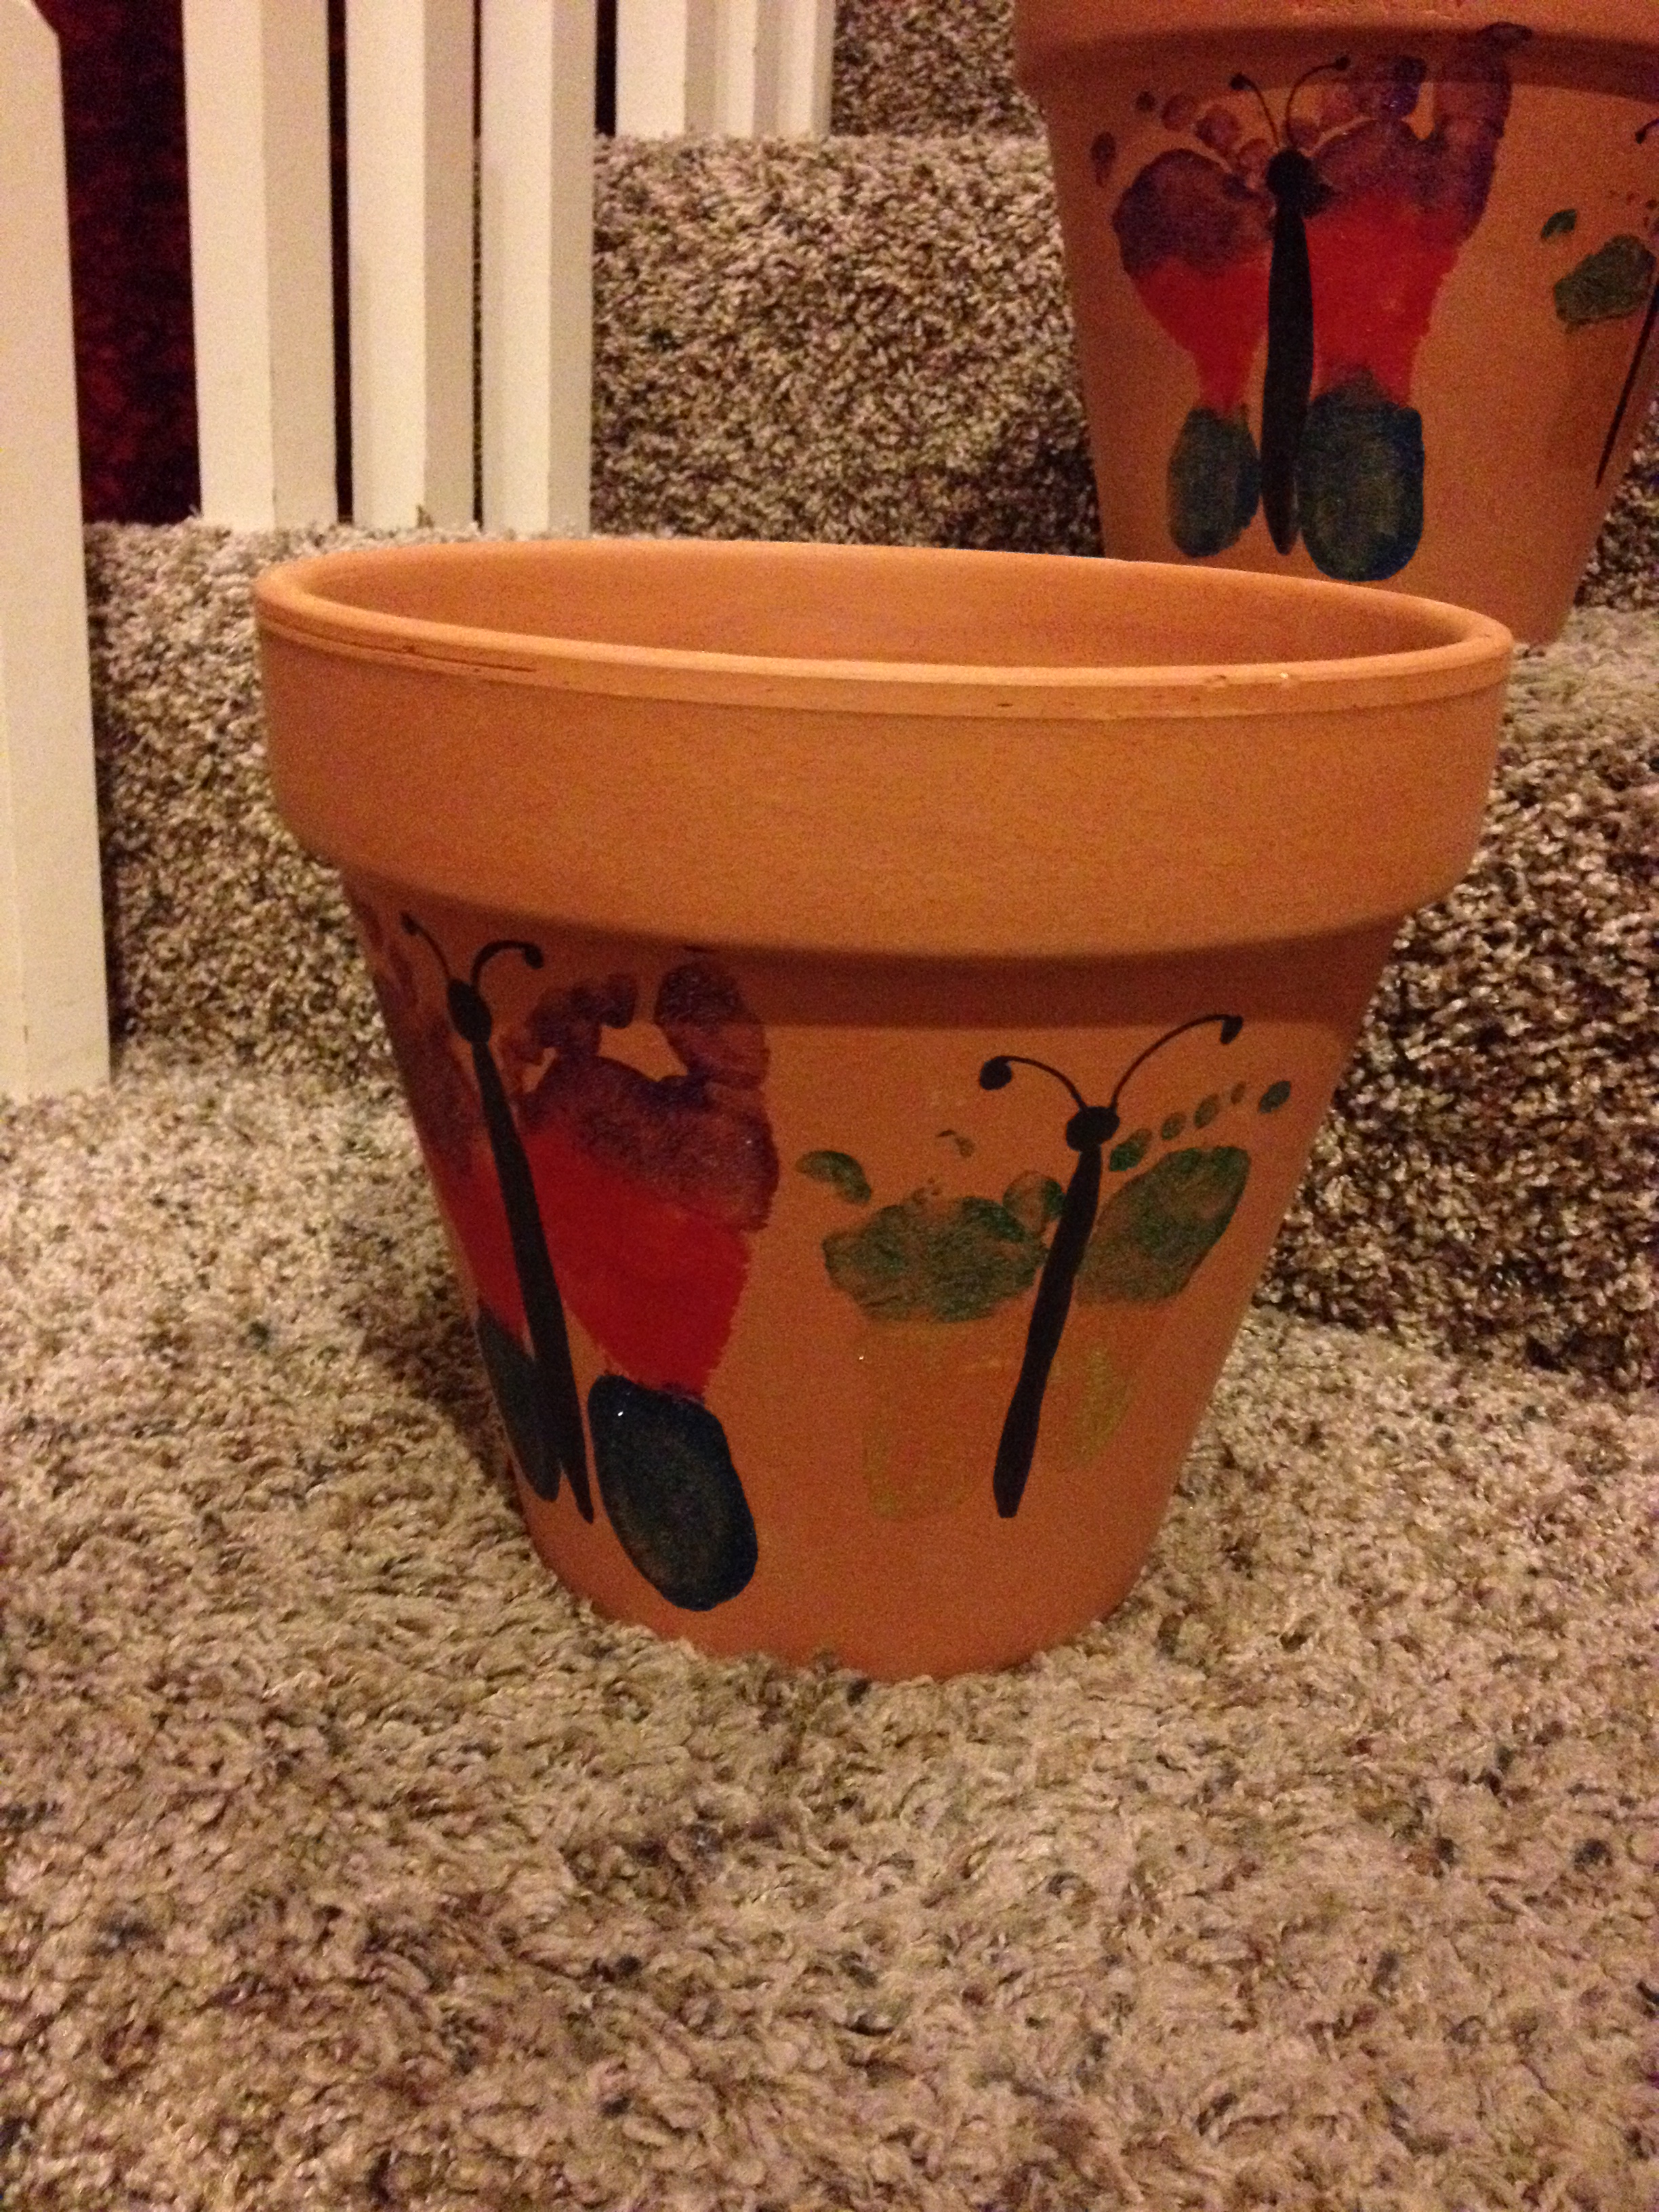
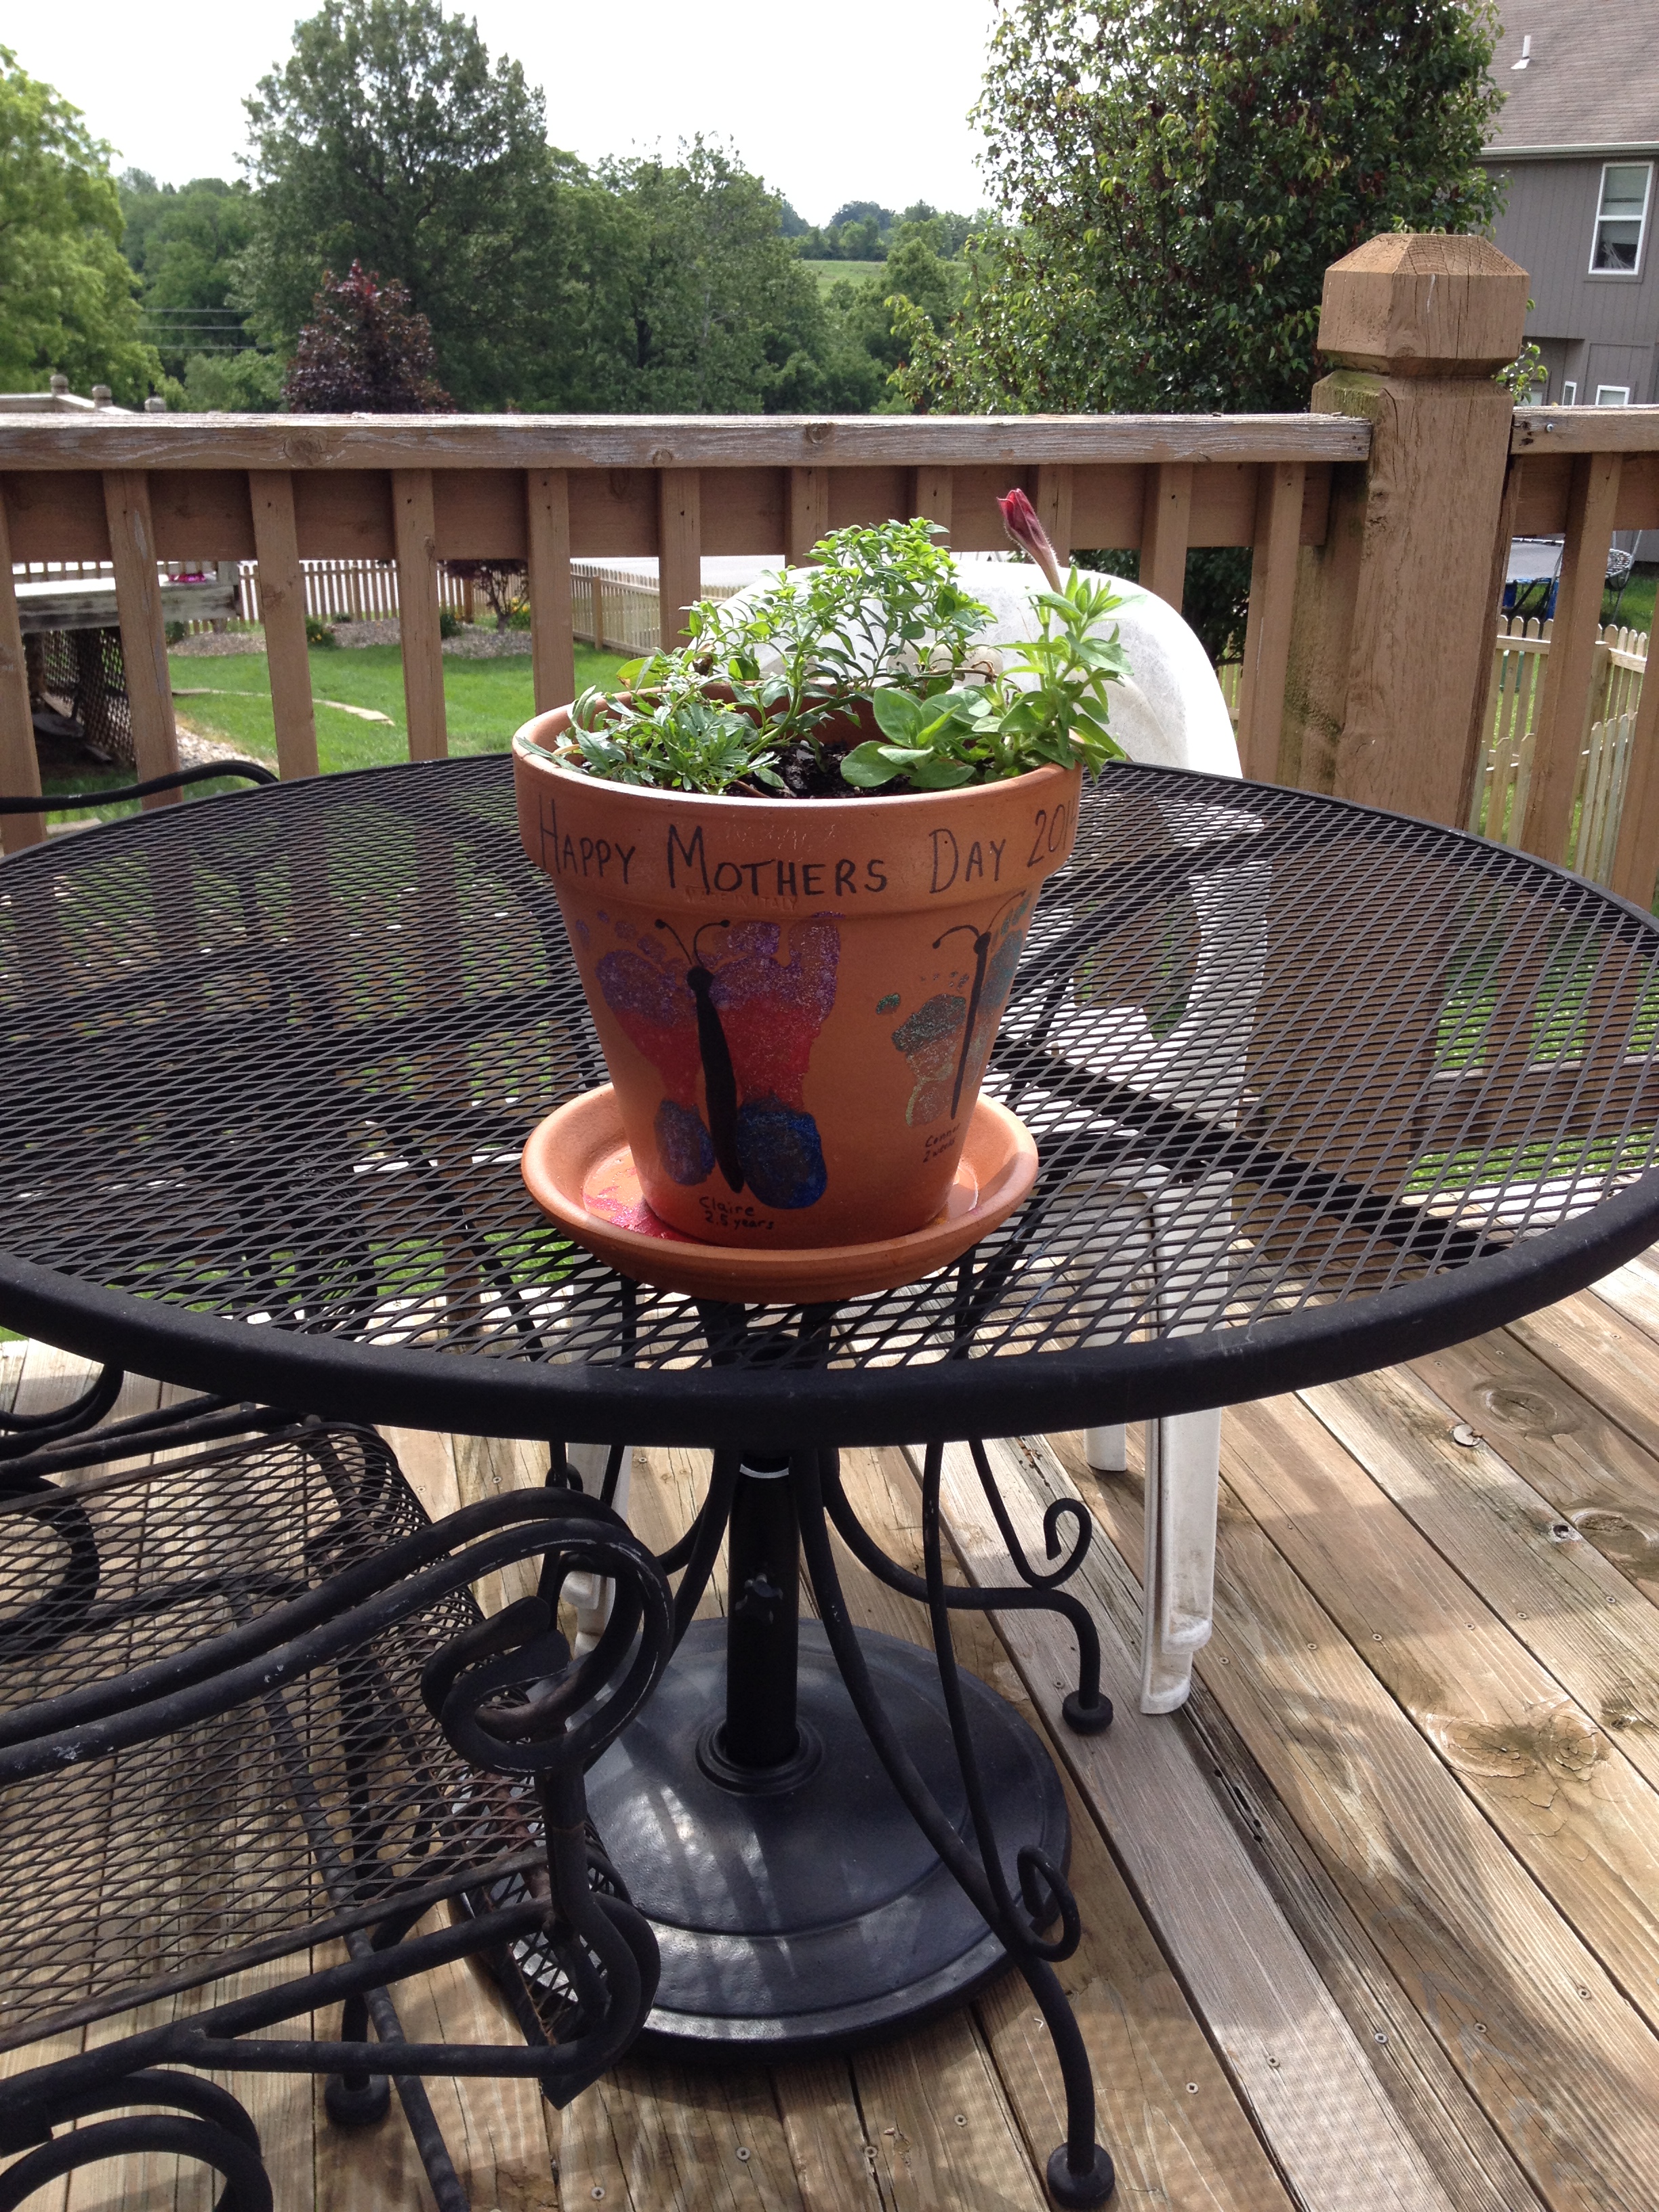
Here is what it looked like with both butterflies complete.

photo 6


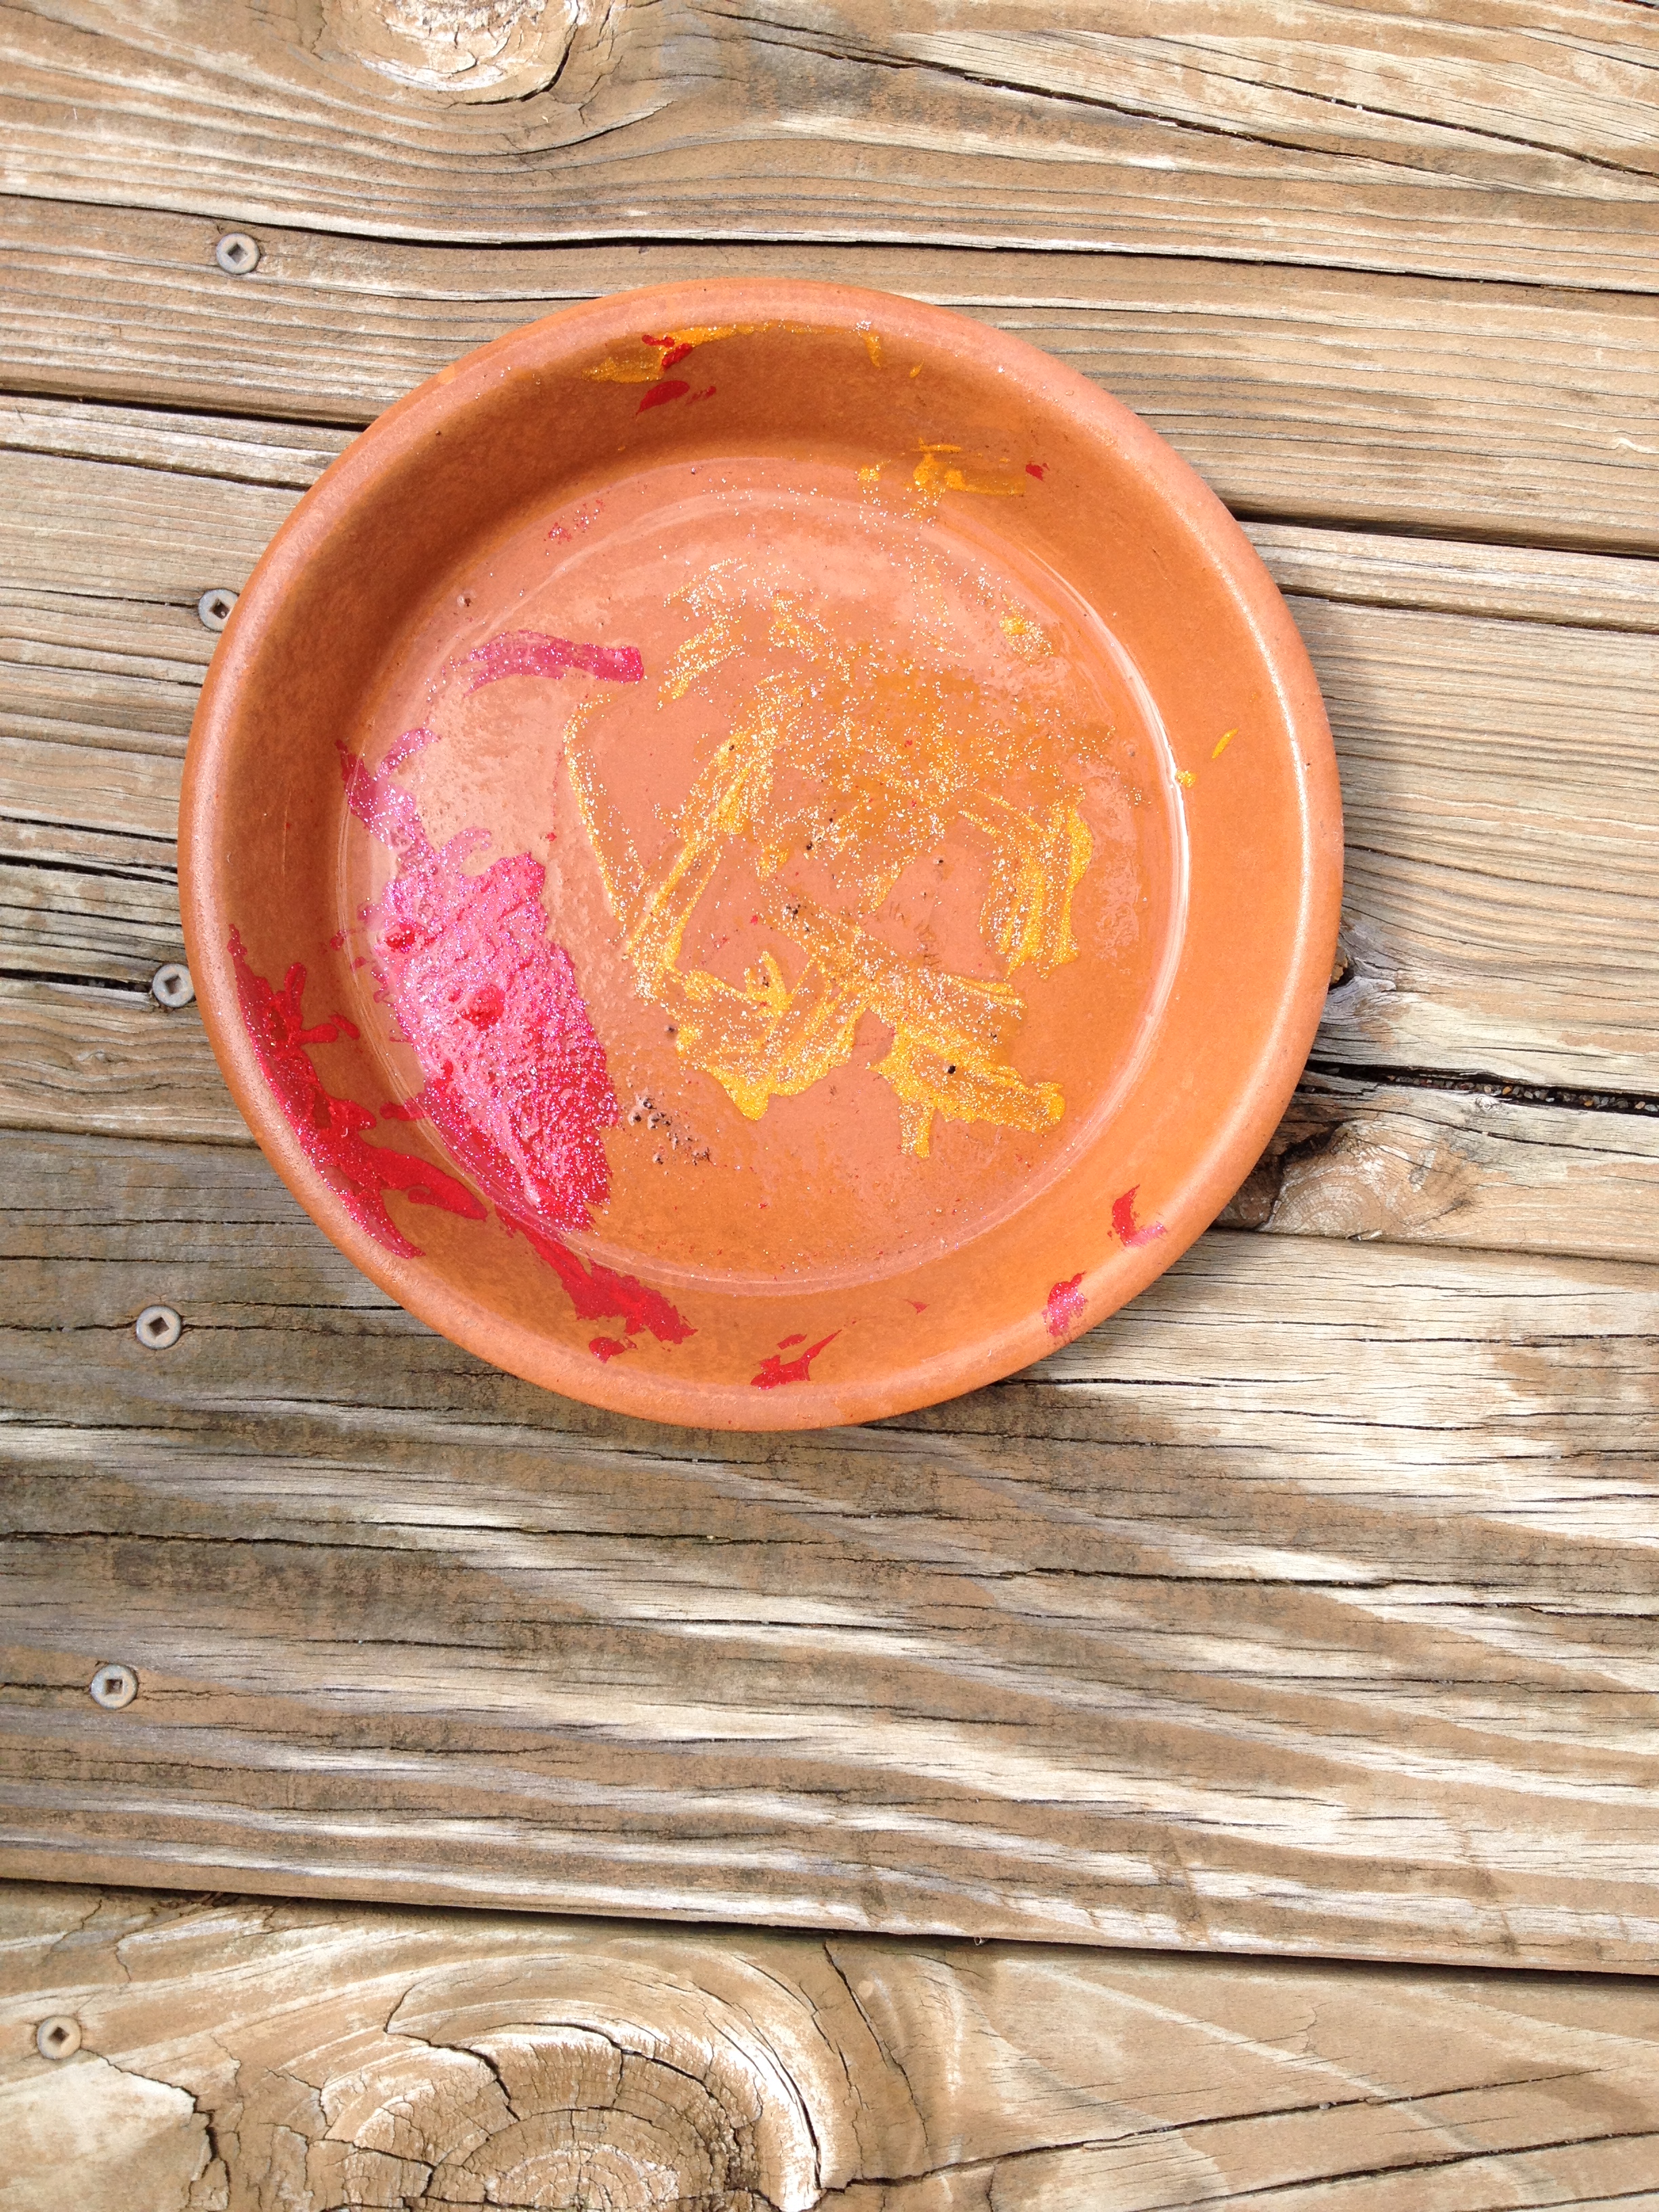
We had extra paint and my daughter loves to paint so we let her paint the tray that goes under the flower pots to add a special touch to them.

photo 8

My husband wrote on the top of the pots “Happy Mother’s Day 2014” and the kid’s names and ages. Yes, my husband has better handwriting than I do.

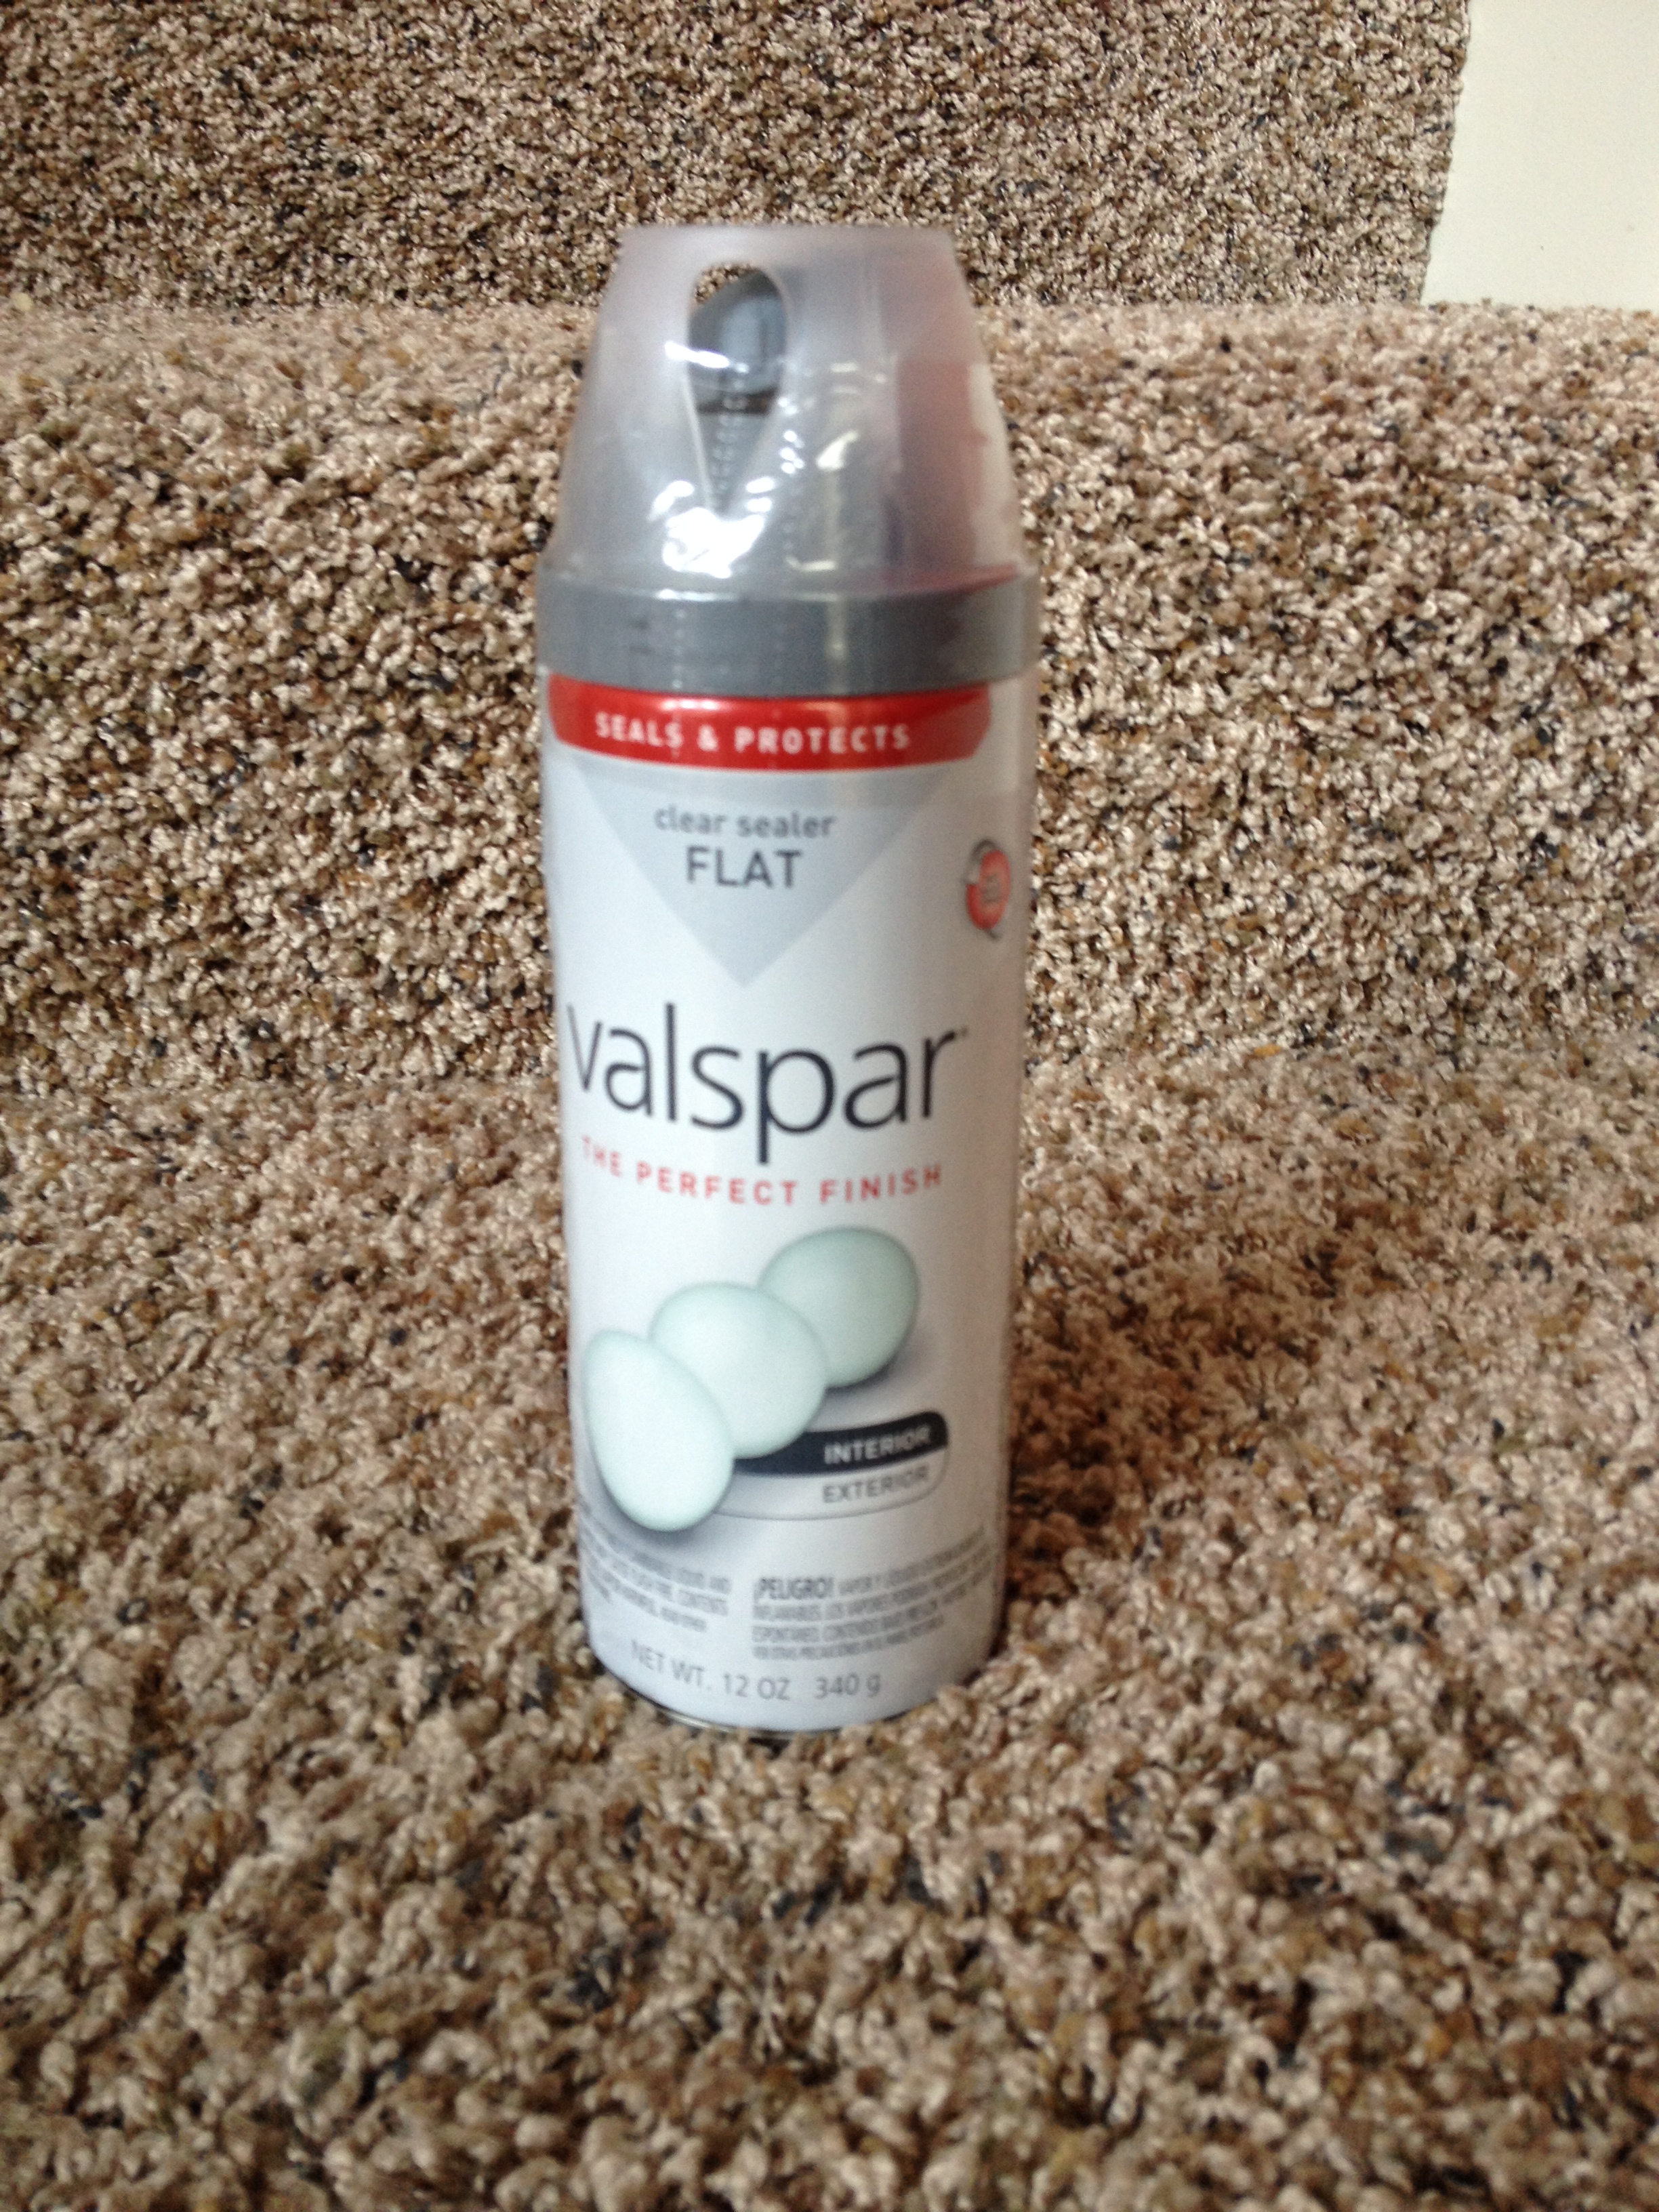
The washable paint was great for getting the paint off of the little feet but we didn’t want the paint to come off of the flowerpots so we sprayed the flower pots with a clear sealer to protect the footprints.

photo 7

When everything was drying we went to the store and picked out flowers to put in the pots. My daughter just loved this part! She had a great time getting all the colorful flowers! After the pots were dry we planted the flowers and our mother’s gifts were complete!

photo 9

This project was a lot of fun for all of us and was pretty easy! This was a great way to give a personalized gift that the moms and grandmas loved! I would call this a Pinterest success!

Leave a comment »