The Crazy Hat Box

there's a hat for that!

Planning a Monthly Dinner Menu

recipelist

Do you ever stand in your kitchen at 5:30pm and know that you need to make dinner, but you have absolutely no idea what to make?  It’s not that you don’t have plenty of food, but without a recipe, it’s all just a bunch of purposeless ingredients.  I do this more than I care to admit.  Enter the monthly menu plan!

A few years ago, in efforts to reduce the amount we spent on groceries, and to decrease the number of times I stood in my kitchen for 15 minutes trying to think of what to have before just making grilled cheese, I started grocery shopping once a month, which forced me to plan a dinner menu for the month.  That way, on my one trip to the grocery store a month, I was able to buy all the ingredients for all the meals I planned to make.

I’ve perfected monthly meal planning to how it works best for my family, so I thought I’d share a few pointers.

1. You Don’t Have to Plan 30 Meals

Monthly menu planning can seem really overwhelming when you think you have to plan and shop for 30 meals.  But in reality, we rarely eat at home every day of the week.  Think about your week.  Are there days you don’t eat at home?  We eat at my parents’ house once a week, and at my in-laws’ once a week.  There are two meals I don’t have to plan. Maybe you have family dinners or you know you eat out so many times over the month.  Subtract those times.

Then, take into consideration that some meals are going to be things you can quickly put together – meals you know you always have ingredients for.  I know that at least once a week I’m not going to want to make a meal I have to read a recipe for.  These are your go-to meals for busy/lazy days.  For us, it’s Chicken Noodle Soup or Pizza or Breakfast Food.

Finally, allow for left-overs.  If you make big batch of soup on Monday and know you’ll have leftovers, plan to have it again on a day you won’t feel like cooking.  You can even mix it up so it doesn’t feel like the same meal.  Add another ingredient before warming it up, or serve different sides with it.

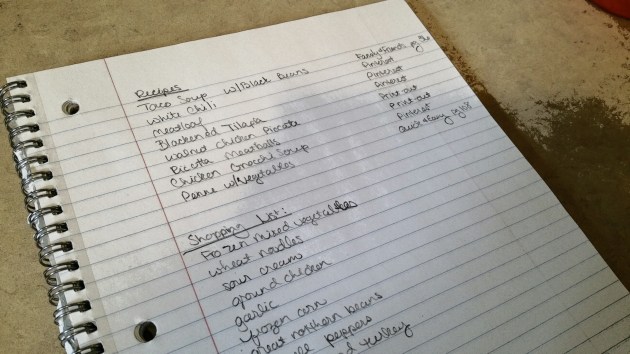
Tip: Write your recipes on a white board or chalk board, along with where to find the recipe (Pinterest or recipe book with page number) so you can easily see your options for meals to make.

2. Don’t be Overzealous

When I pick recipes, I peruse Pinterest or recipe books I have (one of my favorites is Betty Crocker’s Quick and Easy Cookbook), but I don’t pick anything that has more than about 7 ingredients.  While I would like to think I can cook like a gourmet chef, in reality, I’m not going to want to test that theory on a Tuesday night.  Pick things you’re comfortable making, things you’re familiar with.  If you want to try new meals to expand your cooking expertise, pick one recipe that’s more challenging.  And remember, you have to shop for these ingredients – don’t pick recipes that you’ll have to run all over the city to find ingredients for.

Tip: When picking Pinterest Recipes, create a board just for that month’s recipes.  That way, they’re easier to find and you won’t have to scroll through every recipe you’ve ever pinned.  Just remember to move recipes to you other recipe board at the end of the month, before adding new recipes for the next month!

3.  Pick Recipes That Compliment Each Other

When you’re looking through recipes, think about how you can use the same ingredients for other meals.  For example, if I’m planning on making a chicken in the crockpot, I plan on another meal that also uses chicken because we’re not going to eat a whole chicken in one meal.  I might choose to make Chicken Noodle Soup or Chicken Enchiladas later that week.  This will decrease the waste of ingredients not used up and will also help you save money on your grocery bill.

Tip: Pay attention to cook or prep times.  I can’t tell you how many times I’ve chosen a recipe and stood in my kitchen ready to cook only to realize I should have marinated something overnight or that I have to let dough rise 15 times over 3 hours. 

4.  Don’t Forget the Sides

I very rarely plan to have specific sides with my main courses, but I always try to have a good selection of vegetables, fruits, rice, pastas, etc., I know my family will eat. Then, I just make a couple of those to have a well-rounded meal.


I usually plan for about 12-15 dinners a month.  Then, I get all the ingredients in one shopping trip.  That way, I have a go-to list of recipes to make, and I already have everything it takes to make them.  Please note, I don’t plan a menu for breakfasts or lunches, mainly because my family eats the same basic things for those meals, so they don’t require much planning.

Still having trouble coming up with meal ideas?  Visit our Pinterest Board The Chef’s Hat – Monthly Meal Planning Ideas.

Leave a comment »

Countdown to Thanksgiving – 4 Days left!

Continuing our countdown to Thanksgiving, here’s a post about a food we feel obligated to have on our Thanksgiving table…


 Cranberries and Thanksgiving

Cranberries.  It’s the food we feel that we have to serve at Thanksgiving, but is anyone sure why?  It’s the only time I ever eat cranberry sauce, and I don’t even enjoy it – I eat it out of obligation.  So, before you open that can of jellied cranberry sauce, here are a few alternatives to incorporating cranberries into your Thanksgiving meal.

Cranberry Dip – What a great hors d’oeuvre!  And everything tastes better with cream cheese!

Cranberry Apple Sauce – A great idea, especially if you prefer to mute the tangy cranberry taste.  An added benefit is that this is made in the slow cooker, and you can even make it a few days in advance.  One less thing to worry about on the big day!

Cranberry Muffins – This recipe could be a sub for both cranberry sauce and rolls.  Brilliant!

Cranberry Cake – Want to incorporate cranberries into dessert instead of the main meal?  This is your recipe!  This is a great addition to the traditional pie, too.

Cranberry Mojitos – This festive drink is perfect for Thanksgiving.  And if you’re feeling a little stressed, this can also probably help.

Of course, if you’re stuck on having cranberry sauce for Thanksgiving, here’s a simple recipe that has just three ingredients – Cranberry Sauce


Want more ideas for Thanksgiving?  Check out our Pinterest Board, The Pilgrim’s Hat!


1 Comment »

Countdown to Thanksgiving – 6 Days Left!

Easiest Turkey Recipe EVER.

IMG_8950

Many of us have been there.  Our first year hosting Thanksgiving.  I don’t know why, but for me and many others, the turkey is the most intimidating.  I happily volunteered for Thanksgiving a few years back.  I had the table pictured in my head.  It would be lovely.  My best dishes, candlelight, beautiful linens.  Everyone laughing and having a marvelous time.  Then I realized I would have to make the turkey and that sobered me up quickly.  I mentioned my terror to a co-worker and she said to me, “Oh, I have a recipe that is so easy, you just can’t mess it up.”  I was on the edge of my seat.  So, here it is:

What you need:

1 Apple

1 Orange

1 Lemon

(This amount is for a smaller turkey.  If you have to make a big one, just add as needed)

Butter

Bag for baking the turkey in (if desired).  We learned the hard way to make sure you look at how many pounds the bag is made for.  That’s another story for another time.

Instructions:

As far as actually baking the turkey, there should be instructions on how long and at what temperature you need actually with the packaging of the turkey.  If it doesn’t, try this website.  I follow the instructions for the stuffed turkey, even though you don’t eat the stuffing.  Also, make sure you remove the bag that has all the “guts” of the turkey.  You really don’t want to roast your turkey with that inside of it.

To prepare the turkey, we always butter the outside.  This is a very slippery project so I highly recommend doing it over a nice clean sink.  Next, you want to wash and quarter your fruit.  If you have to add extra, just do a slice of each at a time until you have a nice full cavity.  It doesn’t need to be packed in like sardines, just pretty full.  Place the turkey in your bag if you are using it (also do this over the sink, we almost lost a turkey this way).  If not, go ahead and place the turkey in your roaster pan in the oven.  Now, I don’t use my oven.  I highly recommend a roaster oven.

Roaster Oven

It does a beautiful job of roasting the bird and it leaves room in your oven for all of the other delicious food you need to put in there.  When your turkey is done, it should be moist and tender.  You will smell citrus, but it won’t taste citrusy at all.  It has worked every time for me without fail.  Thank you Carolyn for saving the day with this great recipe!

Leave a comment »

Countdown to Thanksgiving – 7 days left!

Here at the Crazy Hat Box, we love Thanksgiving!  We love it so much, some of us celebrate it twice a year!  So in honor of this great holiday, we’re doing a countdown to Thanksgiving filled with recipes, activities and all things Thanksgiving!

First up, a recipe that puts a spin on the normal mashed potatoes you see on the table on Turkey Day.


Recipe:  Sinful Potatoes

My family has had Sinful Potatoes at our Thanksgiving table for as long as I can remember.  They are so creamy and tasty, and they go great with turkey, dressing, and gravy.

Ingredients

2 lbs frozen hash brown potatoes, thawed

1/2 C melted butter or margarine

1 tsp salt

1/4 tsp pepper

1 can cream of mushroom soup

2 C grated cheddar or colby-jack cheese

1/2 C chopped onion

2 C sour cream

Unseasoned bread crumbs


Combine all ingredients except crumbs in a large bowl.  Mix well.  Spread in 9×13 pan and top with bread crumbs.  Bake at 350 degrees for one hour.

IMG_9020

That’s it!  Super easy and super yummy!

For more Thanksgiving ideas and recipes, visit our Pinterest Board, The Pilgrim’s Hat!

Leave a comment »

Apple Dump Cake

Fall in the Midwest is about all things apple.  I love apples!  This recipe is so easy.   This one is for individual sized dump cakes.  In my opinion it’s not nearly as good heated up later, so, I usually make single serving/s.  It’s easy to make a 3 or 4 person serving or a big one.  I will include instructions for each.  On a side note here is a great website for all kinds of great information on apples.

Ingredients:

Dump Cake 1

1 medium to large apple of your choice (I love Honeycrisp or Gala apples, but any will do)

1/2 cup of cinnamon chips (you get these in the same place as you get chocolate chips at the store).  You can add more or less to taste.

Yellow cake mix (I use Jiffy Cake Mix for the smaller, 3 to 4 person size.  I use a regular size cake mix for the big one)

1/4 to 1/2 stick of butter

Vanilla Ice Cream (optional) (I say optional, but it’s really so much better with the ice cream)

Instructions:

Preheat your oven to 350 degrees.

Cut up your apple/s into bite sized chunks and put in the bottom of your muffin tin.

Dump Cake 2

Put a few cinnamon chips in with the apples.

Dump Cake 3

Cover the top with the dry yellow cake mix and pat down.  You can save the extra cake mix in a Ziploc baggie.

Dump Cake 4

Slice the butter into thin slices and place on top of the cake mix until the entire top is covered.

Dump Cake 5

Bake in the preheated oven for about 50 minutes.  If you bake this in a regular cake pan I recommend a full hour in the oven.

Dump Cake 6

It will be bubbly and golden brown on top.  Wait a few minutes to serve because it’s ‘melt-your-face-off’ hot at this point.  Don’t wait too long though, because you want it to be warm.  Put a scoop or 2 of ice cream on top and you are ready.

Dump Cake 7

Variations

For the 3 to 4 person variety just use 2 to 3 large apples, 3/4 to 1 cup of cinnamon chips, a Jiffey Cake Mix and 1/2 to 3/4 stick of butter.

For the regular sized cake mix, use 4 to 5 large apples and 1 to 1 1/2 cups cinnamon chips.

Baking time and temp is the same.

Make Ahead Instructions

This would look great to make ahead in individual servings in little canning jars.  But wait, you say, the apples will turn brown.  Never fear.  I have instructions for how to keep apples from browning when you cut them up ahead of time.  Here they are.

Leave a comment »

Easy Slow Cooker Hot Apple Cider

This is the cheaters way to make cider.  I would love to say I juiced apples and made if from scratch, but I didn’t.  I think this recipe is pretty delicious on a cool fall day though.

Cider 3

What you’ll need:

Your choice of apple cider.

1 apple (any kind will do)

Cinnamon.  I highly recommend cinnamon sticks, but I didn’t have any on hand so I used ground cinnamon.

A pinch of nutmeg.

A pinch of ground cloves.

Directions:

Pour apple cider into your slow cooker.

Cut up the apple and dump in.  I use the core too, but I take the seeds out so no one chokes on one.

Cider 1

Sprinkle ground cinnamon to taste.  I use a generous helping because I love cinnamon.

A shake or two of the nutmeg and cloves (a little goes a long way with these 2 spices).

Cider 4

Turn the slow cooker on high if you only have a couple of hours before serving or low if you have longer.  Stir occasionally.

It would be delicious with some orange zest in it.  It makes the house smell great too!

Good to the last drop!

Good to the last drop!


Leave a comment »

Keeping Cut Up Apples From Browning (No lemon juice required)

I’ve tried this several times and I have been really happy with the results.  It’s really nice to be able to prepare a healthy fruit for lunches ahead of time.

You will need:

The amount of apples that you need for the week

A large bowl

Chewable Vitamin C tablets

A Ziploc bag

A spoon or something to smash the pills with

What you need

What you need

Instructions

Put a couple of the chewable vitamin C tablets in the Ziploc bag.  With the back of a spoon, smash them into a fine powder.

Crisp Apples 2 Crisp Apples 3

Fill the large bowl about halfway with cold tap water.  Poor in and stir the vitamin C powder.

Crisp Apples 4

Vitamin C Water


As you can see, the powder will not completely dissolve, that’s ok.  The water should have an orange tint to it.

Cut up the apples you will need for the week into whatever size you want.  Put them in the vitamin C filled, cold water.  Soak for approximately 10 minutes.

Crisp Apples6Crisp Apples 5

I also push them down in the water and hold them for a second or two to make sure they are completely covered.

You can strain them or set them on a paper towel to drain the excess water.

Crisp Apples 7

Just after the bath

Put them in whatever air tight container you want and store them in the fridge.  They should stay crisp for at least 7 days.

Ready for the fridge!

Ready for the fridge!

They do get very slightly brown, however, nothing like they normally would.  They stay very crisp.

24 hours/day 1

24 hours/day 1

Day 2

Day 2


Day 6

Day 6

I won’t bore you and keep posting.  You get the idea.  I will say that I’ve only done this with apples that are crisp.  I’ve never tried a softer apple such as a Red Delicious.  I like anything that you can prepare ahead, so this is one I use on a regular basis.

Leave a comment »

Hosting Outside the Box

When I was first married and wanted to host something, it was almost always dinner. I mean, that’s what you do, right? You have people over for dinner. You get a date on the calendar for a Friday or Saturday night. You search the World Wide Web for a new, fun recipe. Once you find one that doesn’t have too many ingredients, or at least all ingredients that you’ve heard of, then you realize you’ve wasted 2 hours and move on. The day arrives and you scrunch in all of the last-minute cleaning that you procrastinated all week, light a great smelling candle in the powder room, put on some music and you are ready for your dinner guests. They get there, you take their coats, pour some drinks, maybe have a little conversation and then dinner is served. I have had many a fun night with this same scenario. I will always want to have people over for dinner. But, there are some fun options. I’m learning to host outside of the box. I’m sure none of these are original ideas from me. You may have tried every one of them. I’ve tried some, but I plan to try them all. Here goes…

Brunch

Our little town has a parade in May every year and it is a blast to host brunch on our sun porch and watch the parade.

Afternoon Tea

Little sandwiches and delicious desserts. So many fun things you can do with this.

Afternoon Tea 1 Afternoon Tea 2

Progressive Dinner

This was quite popular when I was younger. You have hors devours at one house (or I’ve been to one at restaurants), salad at another, dinner at another and dessert at the final house. You could add after dinner drinks if you wanted to.

1 House Progressive Dinner

You could have hors devours on the front porch, salad in the eat-in kitchen, main course in the dining room and dessert in the back yard or any combination of those. The fun thing about that would be that you could have a different ice breaker or trivia type game in each location. You could also choose to set each table with a different theme or the same theme with different colors. The possibilities are endless!

Dessert Under the Stars

Invite people over late in the evening. Set up a table with lots of candles. Put some blankets in a basket or wagon in case it gets chilly. Have a separate table with a bunch of different mini desserts, or set the table and put a little piece of several different things at each place setting. Try some new drink recipes and put some coffee in a thermos so it stays hot. Play music softly in the back ground. It doesn’t have to be fancy. Let creation be the main attraction.

Dessert 2 Dessert 1

Movie and Popcorn Night

Have a popcorn bar.  You can do so many things.  A couple of my favorites are popcorn with Hot Tamales for a cinnamon popcorn taste or popcorn with Milk Duds for a caramel popcorn taste.  If you do popcorn on a regular basis I highly recommend this (it has changed our popcorn popping and eating experience).  You could add movie trivia to the night for fun.  Have a prize for the winner.  It doesn’t have to be expensive.  You could give a box of Hot Tamales or Milk Duds and a gift card (physical or digital) from Red Box.  The cost for the gift card could be as little as $1.00.

Game Night

A classic that is always fun.

Pot Luck

Don’t be afraid to let people bring food too. Have your posse over and set a theme (or don’t) and you can have a blast. You might end up with all desserts, but life is short, live a little!

Think outside the box about who you invite sometimes. Don’t be limited by only people your age or people who may have kids the same age. Branch out. You will get to know some lovely people that way!

Leave a comment »

Make Your Own Tomato Sauce

Remember all those tomatoes you planted a few months ago?  Well, it’s time to do something with them!  There are actually a lot of options when it comes to what to do with tomatoes, other than just canning or freezing them plain.  My favorite?  Homemade tomato sauce.  Tomato sauce is a staple in our house.  It’s great for Chicken Parmesan, spaghetti, pizza, bread sticks… well, you get the idea.  And homemade is sooooo much better than store bought.  And you know exactly what went into making it (and there aren’t any ingredients you can’t pronounce)!  The best thing is that it isn’t that hard to make – although it is a little time consuming.

First, you need A LOT of tomatoes.  I’ve found that, generally, since the tomatoes have to be boiled down to make the sauce, I get about a half cup of sauce per pound of tomatoes.  I started with about 25 pounds of tomatoes.

So what happens if you didn’t grow that many – or any at all?  No problem!  Find a local farm that sells their produce to the community or visit your local Farmer’s Market.  Don’t know how to find a farm?  Check out http://www.pickyourown.org/.  Not only can you find local farms and orchards for a variety of produce, it also has instructions for canning and recipes!

image001

Boil water in a big stock pot.  When the water is boiling, put in as many tomatoes as will fit and boil for 4-5 minutes.  This will loosen the skins, making them easy to peel.

image002

When the 4-5 minutes are up, take the tomatoes out of the pot – you can use tongs or a big, slotted spoon – and put them in an ice bath.  They can stay in the cold water while you work on peeling each tomato.  Repeat these steps for the rest of your tomatoes.

image003

In between putting tomatoes into boiling water and then into the ice bath, you can start coring and peeling the tomatoes.  After your core and peel a tomato, cut it into quarters, then squeeze the juice out of each quarter (I just use my hands) and put it into a colander to drain more while you core, peel, cut, and squeeze the others.  You can also put a bowl under the colander to catch the juice that comes off of the tomatoes.  You can use this juice in cooking or to drink!

image004

image005

When you’re done boiling, coring, peeling, cutting and squeezing all of your tomatoes, give them a good press in the colander to squeeze out the rest of the juice, then put them into a stock pot.  On a side note, if you’d rather not make sauce, you can just freeze or can the squeezed tomaotes for use in soups and stews later.  I used two stock pots because I wanted two different flavors of red sauce.  Turn the heat on high until the tomatoes start to boil, then reduce the heat to simmer.  There really isn’t a way to put a definite time on how long  to keep them simmering; just until the tomatoes have a sauce-like consistency.  While you’re waiting for the tomatoes to boil down, cut up whatever spices you want to put in your sauce and add them to the pot!

You can add whatever spices/vegetables you want!  Here are some options:

  • Minced garlic
  • Salt
  • Parsley
  • Oregano
  • Basil
  • Green Peppers
  • Onion

I made two batches:  One with just oregano and one with Rosemary and Parsley.

image006

When your sauce starts to look like this:

image008

it’s done!

Some people like a chunky texture to their tomato sauce.  If that’s your preference, you’re done!  I prefer a smoother texture.  You can put the sauce in a blender and blend until smooth, or you can use an immersion blender (my favorite small kitchen appliance).

image009

image010

YUM!

Now, you have two options:  Can it or freeze it.  I am not a big fan of canning, and since we have a big deep freezer, I freeze it!  Wait for the sauce to cool, then transfer it to freezer bags (I do so in 1-cup increments).  Put it in your freezer for use this winter!

image011


Want to try your hand at canning?  Check out Pick Your Own’s canning directions!

Want to make salsa instead?  Check out Pick Your Own’s salsa recipe!

Leave a comment »

The Savings Addict Part 3

This is the final post in this 3 part series by Jennifer.  For her bio and to see the previous posts:
Click here for part 1
Click here for part 2

The Cherry On Top

Well, by now hopefully you are saving at least a few bucks but clipping aside, here are a few more ways!    Just to review where to start, first, pay attention to your most frequently purchased goods so that you can stock pile, watch the sales via the ads on Wednesdays and Sundays, and clip those coupons in Sunday papers or from online sources.    Here’s a great way to just add a little extra or a lot, depending on how you commit to it.  Apps and loyalty cards.   Beautiful things.  My mother never had these amazing little money savers when I was a wee girl.  I have a HyVee Fuel Saver card, a Chopper Shopper card, a CVS Extra Care card, a Walgreens Balanced Rewards card, a Hen House Rewards card.  I even have a Lamar’s donut card because I have a donut addiction.  If you use it, find a way to save while using it.  They are loyalty cards afterall, and if they want to pay for loyalty, let them.   These might get you a discount on products in store, or fuel, or even give you cash back for future use in the store.  Now that you’ve signed up for these plastic wonders there are some apps you should know about.

SavingStar.com

You clip coupons via the app or online and it tracks your purchases by your loyalty cards.  You enter those in when you set up your account.  You can get your coupon savings back via your back account, PayPal or gift cards from various retailers.  I had this before I finally jumped on board the the smart phone train.

Ibotta

You take surveys, post on Facebook, or watch a video to earn a certain amount of money.  You do need a smart phone or tablet for this.  You buy the product, scan the UPC, then take a picture of the receipt and viola, the money is yours.  They have bonuses for completing certain tasks which earn you extra money.  They also can be used at restaurants, online retailers, pet stores, home improvement stores, health and beauty retailers, and movies.  In less than a year its given me back $160.  You get your rebates back via PayPal, Venmo (like PayPal) or giftcards.  For me that was about $20 a month.

Shopmium

This app lets you upload the receipt for certain products and then once confirmed the rebate is put directly into your PayPal account.

Shopkick

This you don’t even have to buy anything.  You earn kicks for walking into stores with app open and for scanning products.  However if you want to enter your credit card info, they will give you more kicks as you buy certain items within these retailers.  You can buy gift cards with these kicks and if you just save them up over time maybe that can help with a big purchase.

Checkout 51

This app lets you upload the receipt for certain products and then once confirmed the rebate is added to your account.  When you reach $20 you can cash out and they will send you a check in the mail.  It changes every Wednesday and occasionally has a bonus way to earn extra.

Cartwheel

This is a Target exclusive but my favorite.  This one can be used simultaneously with Target coupons and manufacturer coupons.  This is a flat percentage off of items.  It can be anything from groceries to toys to clothing and more.  You don’t actually need the app but can sign up on Target’s website for it and select the items you’d like to save on then print out the barcode before going to the store.  Sometimes it just saves a buck or two and other times it saves way way more!  I’ve been using it since May 2013, so a little over a year, and have saved $468.  You can only use it in store but it is a gold mine.  The more you use it the more slots for savings you get.  I have 23 slots to fill and I can move things off if I want something else more.  There are limitations.  You can only buy four of each type of Cartwheel item and only use it once a day.
Little by little you will see the savings add up.  Then you can feel less of the squeeze each month or save for that special vacation or splurge or maybe just that rainy day.  However, you choose to use your savings, enjoy!  And remember, there are savings everywhere, you just have to look!


Leave a comment »