The Crazy Hat Box

there's a hat for that!

What Your Pharmacist Wishes You Knew

A great post from a guest blogger, a Pharmacist, Dr. Becky.

Becky

Greetings friends! My name is Becky and I’m probably the oldest “new” pharmacy graduate you’ll ever meet! After earning my bachelor’s degree in psychology (back in the Jurassic period), I spent 11 years working as a juvenile officer. And then, one fine day, I got a wild hair and decided to go back to school to become a pharmacist. It was a long, hard journey (let me repeat…it was a long, hard journey) but definitely one of the best decisions I’ve made.   Last May, I finally became Dr. Becky (did you know most pharmacists have a doctorate???). And since then, I’ve been practicing community pharmacy and loving every minute of it!

I will probably jinx myself by saying this, but I think I’ve just about seen it all during my time in the pharmacy. Stop it. I know what you’re thinking. How could she have possibly seen it all in one short year? Keep in mind I worked as a pharmacy technician for 5 years before becoming a full-blooded pharmacist. And as I soon found out after entering the world of pharmacy, most folks assume EVERYONE behind that counter is a pharmacist and they aren’t ashamed to share the goriest details of their lives with anyone who will listen. So…I really have seen, heard (and smelled) it all. Believe me when I say nothing really shocks me anymore!

With that being said, and drawing upon the most frequently encountered scenarios in my pharmacy, I’d like to share the top three things I think you should know:

It’s all about the Benjamins.

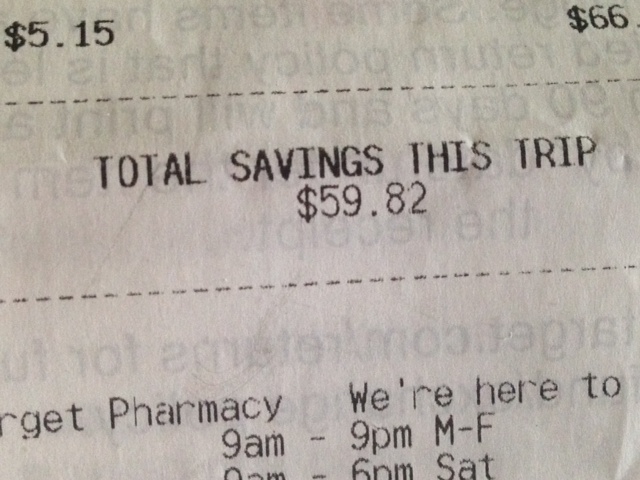
Just because your doctor wrote for generic doesn’t mean it will be cheap. Yes, in most instances, generic is cheaper than brand. However, drug prices and insurance co-payments depend upon lots of things, unfortunately none of which I can control. But, I can help save you money by suggesting therapeutic alternatives and calling your doctor for permission to change. And as a side note, it also helps to know if your insurance plan uses a “preferred” pharmacy or mail-order services, or if you have an annual deductible. I can’t stress enough how important it is to become familiar with your prescription drug coverage, preferably before you need it. This can save you tons of money, time, and frustration. And if you don’t have insurance, take the time to call different pharmacies to compare cash prices.

No magic bullet.

Please do not waste your hard-earned money on weight loss products. Generally speaking, they are ineffective and can have detrimental effects on heart rate, blood pressure and even mood.   It pains me to say this, but when it comes to weight loss, there is no quick and easy fix (despite what you hear on Dr. Oz!). No pill will melt away unwanted fat. It’s all about good old-fashioned diet and exercise. Strive to make long-lasting life style changes that incorporate a healthful, balanced diet and adequate exercise.

Don’t believe the hype.

The internet is a great place to get reacquainted with old friends, check movie times for date night, or even find a last-minute gift for Father’s Day (which reminds me…), but it is NOT a great place to get your medication information. While there are some reputable sites, it still takes some specialized training and clinical skills to appropriately interpret the information. Otherwise, you run the risk of scaring the pants off your behind or discrediting a potentially beneficial treatment option. Listen folks, as tempted as you may be to google the name of the new drug your doctor just prescribed, do yourself a favor and come see me instead. Let me educate you. It’s what I spent 5 years of my life learning to do. And it’s my favorite part of the job.


Take care, God bless, and always remember to be nice to your pharmacist!

Leave a comment »

The Cakeless Birthday

Cake.  It’s the traditional birthday food.  You put candles on it.  You eat it with ice-cream.  If you’re going to a birthday party, you can always count on cake being there.

But what if you (or your kids) don’t like cake?

I know it sounds unbelievable that any kid wouldn’t like cake, but mine don’t.  They never have.  For their first few birthdays, I still made cake or cupcakes because that’s what you do for birthdays.  I’d serve the cake to the guests, and give the birthday boy Oreos or Reeses for his dessert – what he really wanted. But then I thought, why make something they don’t like (as cute as those cakes and cupcakes were)?  It’s THEIR birthday, and who says we HAVE to have cake?  So, I started coming up with alternatives.

Sugar Cookies

My oldest son loves sugar cookies, so that’s been his birthday dessert of choice for the last two years.  They are a great alternative because you can find cookie cutter shapes for almost any theme!  An added bonus is that my kids love to help make sugar cookies, making it a fun pre-birthday party activity to do together!

image007

image009


Rice Krispie Treats

I love this option because you can mold Rice Krispie Treats into any cake pan and decorate it with icing like a cake!  And, you can even add some variety and make them with other kinds of cereal – in this case, I also used Trix.  This is a great option, too, if you’re worried about kids with milk allergies (but in this case you’d probably have to omit the icing).

image003

image004


Donut “Cake”

Technically, donuts are kind of a form of cake, but that deep-fried goodness somehow makes them so much better (and magically makes them ok to eat for breakfast).  I love this because you can stack them like a cake, add icing to decorate them like a cake, and they’re already separated into portions.  And, you can get several different kinds so that everyone is sure to find something they like!

DonutCake

DonutCake2


Oreos

For my youngest son’s last birthday, I made Cookie’s ‘n Cream cupcakes, but I reserved some of the plain Oreos for non-cake lovers.  Since he had a Mickey Mouse birthday party, I made the Oreos look like Mickey, so they went perfectly with the theme!

image011


For your next party, don’t be afraid to think outside the cake pan!  Be creative!

Leave a comment »

Hives! or Put Your Glasses on First

I have terribly dry skin.  In the winter, in the Midwest, it’s something I have to stay on top of or pay the price.  So, I went to one of those places with all kinds of smell-good bath supplies.  I bought a lovely smelling set of lotion and body wash.  I confess that I have learned through the years that any lotion that has fragrance in it isn’t the best choice for my dry skin, but that’s beside the point.  I was excited to use it.  The next morning after I got in the shower I realized I had forgotten to put my body wash in the shower, but it wasn’t worth it, so I just used the regular stuff and decided I would just have to use it the next day.  I got out of the shower, dried off, and applied the lotion.  It smelled really good.  It made me happy.  So, from the neck down, I hydrated my skin.  I put the body wash in the shower so I didn’t forget again, finished getting ready, and I was on my way to work.  Once I arrived, I noticed that my legs were starting to itch a little.  I chalked it up to dry skin and tried to ignore it.  As time went on, the itching got worse and spread.  I excused myself to the ladies room and pulled up a pant leg.  My skin was bright red.  Bumps were everywhere.  Great.  What was going on?  I made it through the day.  When I got home I went to the bathroom to assess the damage.  I went to grab the lotion and look at the ingredients (I’m not really sure why I did this, because I wouldn’t have known what I was allergic to).  As soon as I grabbed the bottle I realized the problem.  I had put body wash on me instead of body lotion.  Yep, just rubbed it all over.  I jumped in the shower to wash it off, but it was too late (it suds up really nicely though).  The damage was done.  A visit to the dermatologist and a lot of oatmeal baths later, I had learned my lesson.  Put you glasses on first Kendel.

Lotion

“Lotion”


Leave a comment »

Savings Addict Part 2

Make sure you read Part 1 of Jennifer’s guest post.  It introduces you to her and has great ideas for savings!

Click here to see part 1.

Part II- Payday!

Where are the coupons?

Well, I get a Sunday and Wednesday paper (no, not at full price, haven’t you been reading?)  I buy a 6 month subscription for $19 (less than $1 per paper) on LivingSocial or Groupon with a one month hiatus in between so I qualify as a “new subscriber” by the fine print of those deals.  In that month I have to truck it to a Dollar Tree that sells a Sunday paper for, you guessed it, $1 when it is $2 everywhere else. You should be getting the ads in your mailbox if you don’t receive the paper every Tuesday. Man I love saving everywhere! But, look out it gets addicting.


Savings Receipt

Savings!

Online:

Coupons.com

Redplum.com

Smartsource.com

Commonkindness.com

Hopster.com


Store coupons sites:

Coupons.Target.com

CVS.com (printed out at the store with a CVS rewards card)

Walgreens.com (or printed out in booklets monthly in the store)

Sprouts.com (or printed out in booklets monthly in the store)

Wholefoods.com

Other:

Brand websites

Facebook pages for brands

At the store with the catalina coupon printer (you know the thing that spits out a whole bunch of paper  next to your receipts when check out that the cashier might be throwing away in the trash…eek Money!)

What you should know about online coupons is when you print them off, usually they are set up to only let your computer print them two times and sometimes just once.  This is where having a second computer comes in handy.  You have to download a lot of coupon printer software as you go, but once its set up, you’re golden.


Combining coupons:

My personal favorites for Super Savings is Target because you can use a store coupon, a manufacturer coupon, cartwheel (to be discussed in the next entry if you’re curious), and a sale.  A lot of times I can get things FREE or very very cheap if I’m paying attention.  If you add a red card there’s an extra 5% off your purchase too.

Rules:

The rules for couponing are…read the fine print.  Some only allow you to use a few per shopping trip and one per product purchased. Also, know the store’s coupon policies.  Most have it on their website, but you can always ask a manager for it if you are in the store without it on hand.  While you can probably get away with using more with an absent minded cashier, it doesn’t mean you should.  Save by the rules please!  That way this beautiful way of keeping your money in your pocket instead of the store’s pockets keeps on happening!

Now that you’ve got all those coupons you have to find a way to organize them in a way that works for you.  The couponistas out there use binders.  I have 3 kiddos that go shopping with me 95% of the time and that little precious basket seat at the front is taken so there is no room at the inn for a behemoth binder.  I use a coupon organizer that I got at Target in the office organizing aisle and that goes with me everywhere.  Just in case I run into a store unplanned to pick up something.  Nothing hurts like knowing you have the coupon for something but its not with you.

Coupon Organizer 1

Coupon OrganizerCoupon Organizer 2


Big thing here…do what works for you.  If its not manageable, you won’t stick with it.  If you don’t stick with it, then you’ll be missing out on  A LOT OF DOUGH over time!  Happy saving!

Leave a comment »

Naked Burrito

Here are 3 recipes that use the same basic ingredients.

Naked Burrito Dip

This recipe is super easy and great for parties.  It’s also easy to double or triple if need be.

Ingredients:

1 can of Rotel (any will do, I use original) OR 1 jar of salsa

1 can of corn (you can use mexicorn if you prefer)

1 can of black beans

2 blocks of cream cheese

Drain Rotel, corn and black beans.

RotelCornBlack Beans

Put the cream cheese in a microwave safe bowl and soften 30 seconds at a time until it is easy to stir.

Cream Cheese

Now mix all ingredients in the microwave safe bowl.  Microwave in 30 second increments until it is warm all the way through, stirring occasionally.  Serve with tortilla chips or corn chips.

unnamed

Naked Burrito Dip

Naked Chicken Burrito

You can also make Naked Chicken Burrito out of this.  Use all of the same ingredients plus 1 lb frozen chicken breasts and 1 container of chicken broth.  Note: This would be a great time to use Ali’s recipe for homemade chicken broth. Put frozen chicken breasts in the slow cooker.  Put all of these ingredients on top (the cream cheese is optional for this).  Cook on low for 8 – 10 hours or on high for 4 – 6 hours (making sure the chicken is thoroughly cooked).  The chicken will just fall apart.  You can serve it in soft shells (although it’s usually too juicy), on tortilla chips, or even on rice.

Frozen Chicken Chicken Broth


Naked Chicken Burrito

Naked Chicken Burrito


Naked Burrito Soup

If you want to make soup out of it, leave the cream cheese out and add a couple of  containers of chicken broth or use Ali’s recipe for homemade chicken broth and add that.  You could add rice to make the soup go farther.

It’s very versatile and it makes a lot for a little.


Leave a comment »

DIY Tomato Cages

Last year, I grew a lot of tomatoes.  I wanted to make my own tomato sauce and salsa and tomato soup (which were all delicious, by the way, if I do say so myself), so I planted 10 tomato plants.  The only problem was that I did not have 10 tomato cages.  I didn’t want to spend the money on that many cages, so I just planted them, and let them kind of vine along the ground.  It didn’t work well.  The tomatoes that were touching the ground rotted fast and the ones that weren’t rotten were eaten away by roly polies.  While I did salvage some of my harvest, it would have been nice not to have to deal with the problems.

This year, I am once again growing a lot of tomato plants, but I had to come up with a better solution.  So, I took a cue from my Dad and made my own!  It’s so much cheaper than buying bunch of cages, and they work just as well.  Here’s how:

What you’ll need:

  • Wire garden fencing
  • Heavy-duty wire cutters
  • Pliers

You’ll need some garden fencing.  The kind of garden fence you get depends on you.  Choose the height based on your preferences.  A common height is 48 inches, which is a great height for a tomato cage.  I got my fencing from my father-in-law, who had some left over, and it was a little tall (about 5 feet), so I had to trim it down.  How much fencing you get is dependent on how many cages you want to make and how big a diameter you want for your cages.  In my case, I used about 5 1/2 feet of fence per cage.   FYI, 50 ft of 48-inch-high fence will run about $50 at your local hardware store; that’s about 9 cages at $5.55 per tomato cage.  Big tomato cages will run anywhere from $8 to $12 per cage at your local garden center.

First, using wire cutters, cut the length of your cages from the roll (again, I used 5.5 feet per cage), making sure to leave one side with longer, unconnected ends.

20140428_101558


Next, cut the bottom, horizontal strip of wire off, leaving the spoke-like ends that you will push into the ground to keep your cage stable.  I had to cut my fence down because it was so tall, but if you bought fencing at just the right height, just cut off the very bottom wire edge (in the picture, I’ve flipped my cage upside-down, so I’m actually cutting off the top).

20140428_101117


Next,using pliers, wrap the ends you left on one side when you cut the length of fence around the the other side, making the fence into a circle.

20140428_102002


And that is literally all there is to it.  Now, plant your tomatoes, push your new cages into the ground around it, and watch them grow!

20140428_102436 20140428_103956

1 Comment »

Bucket of Fun!

I recently gave birth to my second child, a handsome and wonderful baby boy! We made every effort to try and get big sister as ready for a new sibling as we could. One of the things I decided to do was to make a big sister bucket for her to receive at the hospital after the new little one was born. We also let big sister pick out a few small gifts to take to the new baby in the hospital. She loved getting to pick out a few things for the new baby!

The big sister bucket was a huge hit!

photo 1 (2)  photo 2 (2)


I chose  a Thirty One round -about caddy for my bucket. These little caddies are great! They are water- resistant and have a mesh bottom which makes them great for taking toys to the pool or just playing with in the bathtub. This was something that big sister would have a lot of fun using since she is such a water baby. I also had her name put on the front of the bucket to make it even more fun.

photo 3 (3)


Most of the items in the big sister bucket were for big sister to have something to do while we were at the hospital. I wanted to make sure that she had something to entertain her while everyone else was checking out the new baby. So here is a list of what I put in the bucket.

photo 3 (2)

  1. A mess free Crayola coloring set. This was wonderful as the markers will only color on the paper that came with the kit so I didn’t have to worry if she colored off of the page.
  2. Some My Little Ponies. This are very popular in our house and get lots of play time.
  3. An art smock…What toddler doesn’t need an art smock!
  4. photo 5 (2)    A toy tester. More on this later!
  5. And of course a big sister shirt embroidered by grandma! You can’t make a big sister bucket without a big sister shirt!

photo 4 (2)

The toy tester was an idea given to me by my parents as teacher educator. I thought that it was a great way to show my daughter what toys she could safely share with the baby. The toy tester started out as just a toilet paper tube. I added some stickers and some washy tape to it to make it look prettier. My daughter also uses it as a telescope. How the toy tester works is if a toy fits though the tube then it is too small for the baby.

photo 1 (3)


Not a  safe size for baby!

If the toy will not fit in the tube them the baby can play with it.

photo 2 (3)

A safe size for baby.


Big sister stills loves playing with the items that she received in her big sister bucket even now that we are home from the hospital. We often get the toy tester out and test what she wants to give to little brother. This was a fun bucket for me to put together and I really made it nice for my daughter to have something to play with while visiting me in the hospital.


Leave a comment »

Savings Addict Part 1

Jennifer is a stay at home mom to 3 kids, under 5 years of age.  She is also addicted to savings.  AND she’s willing to tell you how you can be too!

Jennifer

Do you like getting a raise?  A bump in the bank account?  I do.  That can be a hard thing to do especially when it isn’t the time of year where your paycheck might actually be increasing.  But did you know that there is money in the Sunday paper and on websites that you’re probably leaving on the table?  I’m not a crazy coupon lady or an extreme couponer, but I do know that I cut my grocery budget by 35% a month by doing a few simple things. I’ll focus on the first two today.  Consider it the observation phase.

  1. Knowing my buying habits and paying attention to the supply and demand of the household
  2. Learning to shop the sales and knowing when certain items were at their lowest prices of the year.
  3. Learning the stores you shop at most, the lowest prices they sell the things you buy, and their coupon policies
  4. Finding the coupons and finding a way that worked for me to keep track and actually use them
  5. Using my smart phone to download a few apps that worked in a rebate sort of function

Savings Addict Pantry

I know what my family goes through.  I know that we go through on average 2-3 boxes of cereal a week.  Cereal has a long shelf life and so this is something I have a lot of on stock in my pantry (notice the 30+ boxes in the picture).  You have to know what those things are because you’re not saving if you’re throwing away a lot of food.  Waste not, want not.  On the other hand you are wasting money if you are waiting to buy something when you run out of it and it is not on sale and there is no coupon for it.  Maybe you’re luckier than I am, but that never happens for me.    Make a list of the top 20 things you buy and start there.

Secondly, there are sale patterns based on holidays and harvest

January- Vitamins, Health & Diet foods

February- Steak, Lobster, and Junk food

March- Frozen food

April-  Candy, Cleaning products, Baking Products and Organic and eco-friendly products

May- Condiments, charcoal, pickles, and chips

June- Salad dressing, condiments, chips, and hot dogs

July- School supplies and Ice cream

August- Lunch supplies and snack foods

September- Meat

October- Candy

November- Turkey and Thanksgiving fixings (stuffing, gravy, and canned veggies, baking products)

December- Baking products, Turkey, and Ham

As for produce, if you buy it when it is in season then you will save money.  It is also good nutritionally for you to have variety. You can see this usually on the front pages of the ads and by what is featured for the sales each week.

Happy Observing!


Leave a comment »

M-I-C-K-E-Y P-A-R-T-Y

There are some days that I think will never end, but when I look back over the years, they seem so quick!  How are my babies growing so fast?  A friend of mine likes to say “the years are short, but the days are long”.  So true.

My baby turned three this month.  THREE!  How is that possible?  Even though I’m always in disbelief at how big they’re getting, I love my kids’ birthdays.  They are so fun!  Every year, we have themed birthday parties for the boys.  We’ve done  a tractor theme, a monkey theme, Very Hungry Caterpillar theme, Cars…  you get the idea.  This year was the first year that little boy was able to pick his own theme, and, since he’s recently become obsessed with Mickey Mouse (if I have to watch Mickey Mouse Clubouse Road Rally one more time, I may get physically sick), he picked a Mickey Mouse party.

There are so many amazing ideas on Pinterest for all kinds of birthday parties – and Mickey Mouse-themed parties are no exception.  So, armed with tons of ideas from Pinterest, along with a menu provided by my Sister-In-Law (who did a Mickey and Minnie themed party for her kids last year), I created a party.  Here are the results.  It was so much fun!

IMG_9083

Signs for the front and back doors.  I found FREE printables for them here.  I glued them onto Mickey shapes I cut out on my Cricut.

IMG_9078

 Mickey Mouse straws from Amazon and a red Solo cup that I glued white ovals on to make it look like Mickey’s pants!

IMG_9102

The main course was, of course, Hot Dog, Hot Dog, Hot Diggity Dogs!

IMG_9094

“Minnie” carrots and jicama with Donald and Daisy dill dip.

IMG_9097

“Chip and Dale” chips and dip with “Goofy” guacamole.

IMG_9103

“Pete’s” pickles (they’re actually my mom’s pickles – she makes the best!).

IMG_9100

And don’t forget the “Mouseketools”!

IMG_9085alt

Every year, I set out note cards and pens so that friends and family can write the birthday boy a note.  Then, I put the notes in the boys’ scrapbooks, so they can see how much they’ve been loved over the years.

IMG_9200

My sweet friend, Kendel, brought all the kids Mickey suckers!

IMG_9147

And the main attraction – Mickey Mouse Cookies n’ Cream Cupcakes!  They were SO GOOD!  Here’s where I got the cupcake stand.

IMG_9082 IMG_9074

I got the recipe for the cupcakes and frosting from Annie’s Eats.  Then, I used Oreo halves and mini Oreos to make Mickey ears.  Just cut an Oreo in half (this works best if you use a serrated knife), then split a mini oreo in two, scrape off the frosting (which I used in the cupcakes – no need to waste!), and push them into your Oreo half.  So cute!

IMG_9156

The Mickey candles were another Amazon purchase, as were the cupcake liners.

IMG_9088

And Oreo Mickeys for those who don’t like cake (aka, my children – weird, I know).

It was a great party!

Leave a comment »

Motion Sick Toddler Equals No Fun for Anyone

My poor daughter suffers from motion sickness which can get kind of tricky when your in-laws live on the other side of the state!

It was a bit of a slow process to figure out what was going on with our little girl. We were in the car and she started to get fussy. She wasn’t old enough to tell us that she was about to lose her breakfast. Being newer parents, what was about to happen didn’t cross our minds. I double checked her car seat straps to make sure they were not twisted or cutting into her arms (since I was sitting next to her in the back seat). I gave her a few different toys thinking maybe she wanted something different to play with. She had just eaten and had her diaper changed before we had left the house about 30 minutes before, so I didn’t think it could be either of those bothering her. Then it happened… I’ll be nice and spare you the details.

My husband pulled off at the first exit that we came to and stopped at the nearby fast food restaurant. He went inside and got some napkins and a few brown bags that the worker let him have. We were totally unprepared! We did our best trying to clean up the car seat and our poor daughter. At least we had some extra clothes for her since we were going to visit her grandparents. We had to put a reusable shopping bag in the bottom of her car seat so that she would have somewhere dry to sit.

The next time she got sick was in her Johnny jump up. Both times she had gotten sick she had eaten eggs, so we were starting to think that she had an egg intolerance. After a few more times getting sick in the car (and having not had eggs) we finally put together that she was having an issue with motion sickness.

So I went to Google and started searching and asked my friends on Facebook if any of them had had to deal with motion sickness. We talked to our daughter’s doctor who recommended that we try giving her Benadryl. I really didn’t want to have to give her medicine every time we were going to be in the car for a while. Luckily for most of our quicker local trips she is fine… not always, but at least most of the time.


I wanted to share with you what we have found that has worked the best for our family. Just a reminder that I am not a doctor and if you have a child that is having issues with motion sickness please check with your child’s doctor.


1. Try and travel when she is sleeping.


One of the first things that has helped has been timing when we are traveling to match either nap time or bedtime. If she is sleeping while we are traveling she doesn’t get sick as much.


2. Watch when she eats.


We watch what she eats and when she eats if we are going to be in the car. We try to give at least two hours after a meal before we have to be on the road. We also try to avoid the foods that have upset her tummy before in the car. The trick seems to be not to have her tummy be too empty or too full.


3. Ginger Ale!


This discovery has been amazing! It was suggested by one of my Facebook friends. I’m not sure what it is about ginger that helps settle a stomach but this has really worked for us. We normally just let her have milk and water, so the ginger ale is a special road trip treat. She doesn’t need a lot of it for it to help keep her tummy settled. We found a certain type that we like from the store that is all natural so I feel better about giving it to her. My husband and I try to make sure that we always have a few cans on hand and that we take enough on our trip for any smaller trips that she might need it for and for the return trip home.


4. Be careful of what activities are done while in the car.


I have to make sure that my daughter doesn’t watch any movies or read any books while in the car. It is better for her if she looks out the windows.


4. Be prepared.


This is the best tip that I can give you because sometimes the motion sickness just happens even with our best efforts to help control it. I have made a car-sick kit that I carry in my purse all the time.


photo 1                         photo 2


This kit includes a travel size bottle of our favorite cleaner, wipes, and lots of plastic bags. I also keep in the car a waterproof seat pad that can be placed in to the bottom of the car seat so that my little one doesn’t have to sit in the wet seat. I only use this if the seat is really bad since the car seat safety recommendation is that you don’t add any products to the car seat that didn’t come with the seat.  I also carry a change of clothes for her at all times in my bag.

photo 4

For longer road trips I pack a full cleaning bucket. In this bucket I include a bottle of cleaner, lots of rags, and a wet bag for soiled clothes. I also pack lots of extra outfits in my daughter’s suitcase. I hope that as she gets older she will know what is happening and be able to tell me in time to get the bucket to her so that she can use it and we will have less to clean up.


photo 5                             photo 3
Hopefully as our little girl grows, the motion sickness will affect her less.  It is still something that I deal with as an adult so I don’t know that she will outgrow it completely. Being prepared has helped make our travels much better even if we have some messes to clean up along the way.

Leave a comment »